Suzuki Swift Cabrio
The Culcon Project
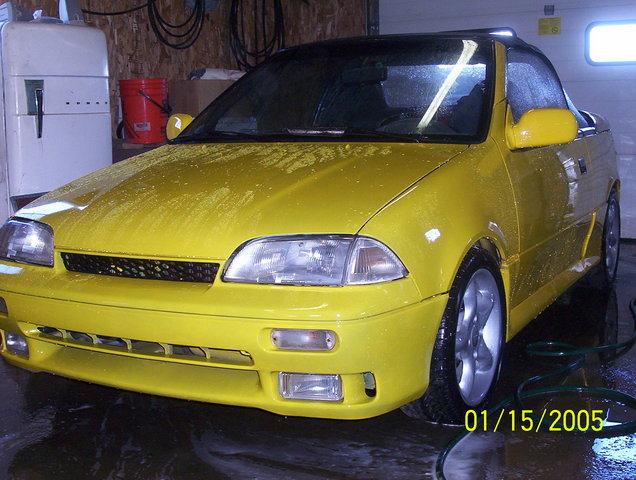
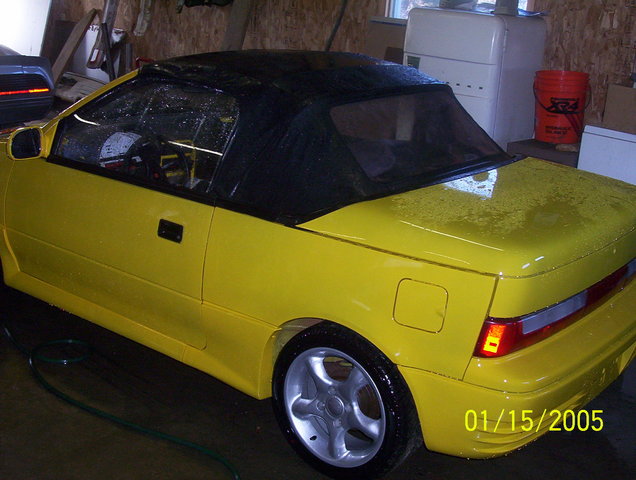
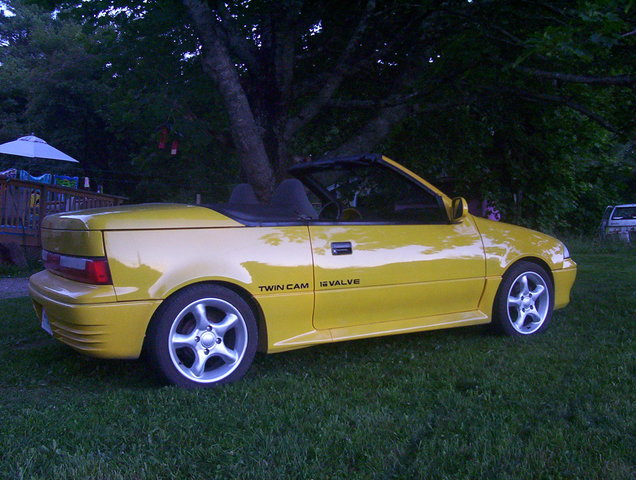
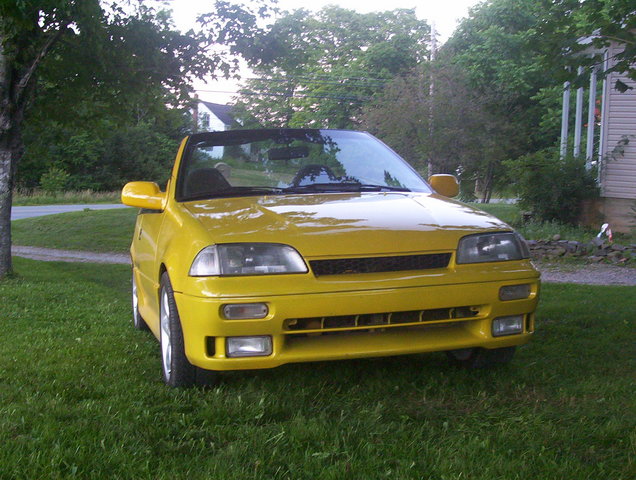
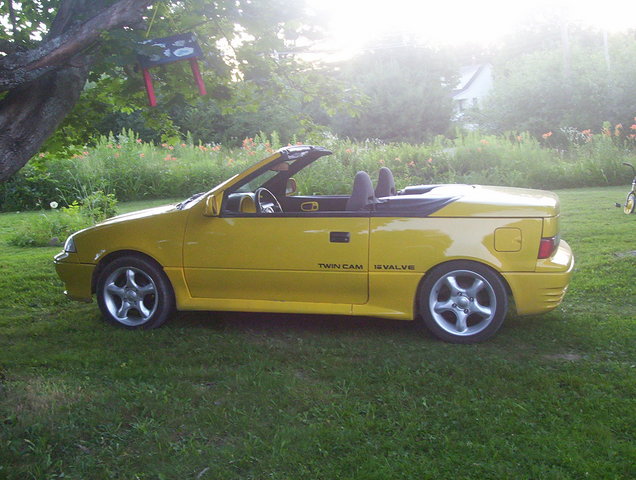
| What the Suzuki based convertibles should have been from the factory | |
It
all started with a 1991 Chevrolet Sprint convertible. 3 speed
automatic, 1.0L 3 cylinder raw Suzuki Motor Corporation
engine rated at
55hp. It was bought for my wife brand new as a high school graduation
present. Somewhere
along the way, I inherited it to use as my daily driver to work. For a
3 cylinder, it got alright gas mileage; nothing too spectacular. If you
want to drive like an old woman, you could probably get decent
mileage. I
didn't. One
cool fall day, and I wasn't pushing the sound barrier with it at the
day, the car simply stopped running. On my way to work one morning, I
was going about 100 km/h. Next thing I knew, the motor just quit. After
getting it home, found that plug #1 literally blew apart. The bottom
half of it was just gone. And so begins the journey to my car project. I
knew right off I wouldn't be putting another 3 cylinder motor in the
'vert. That is just too much pain and suffering. I did a few searches
on the internet to see what was available to swap in
Sprint/Metro/Firefly cars for more power. My searches lead me http://www.teamswift.net,
and http://www.joeld.net/metrozone/metrogti.html
where I found my information, and much
more. I also found http://www1.neweb.ne.jp/wb/culconclub/,
and I knew I would be making an identical
Cultus convertible. In
essence, it's a Sprint 'vert with a different motor/tranny/trim
package. The Cultus is the Japanese version of the Suzuki Swift, and
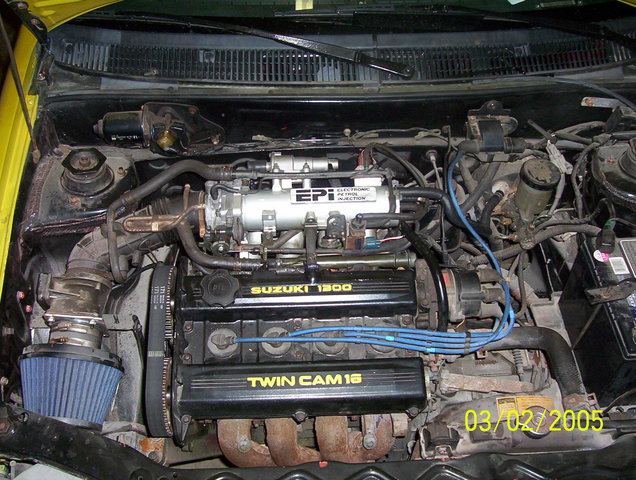
wasn't available here in North America. It usually had a 1.3L 4
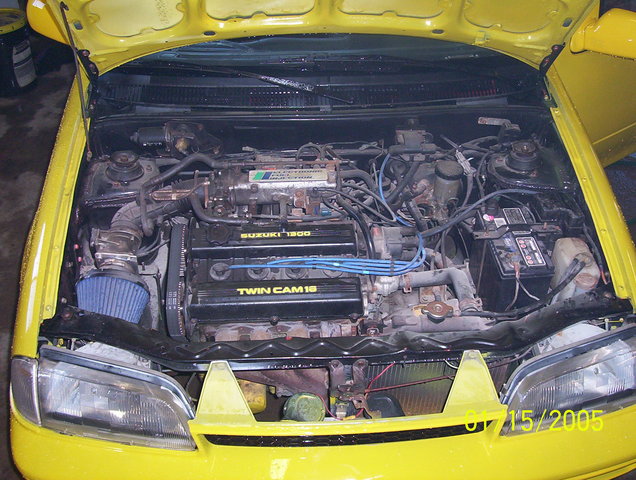
cylinder 16v SOHC. I'm taking this a step further and putting in a 1.3L
DOHC motor from a donor Suzuki Swift GT. I'll also be swapping the
dash, bumpers, hood, lights, etc to make it look like an authentic
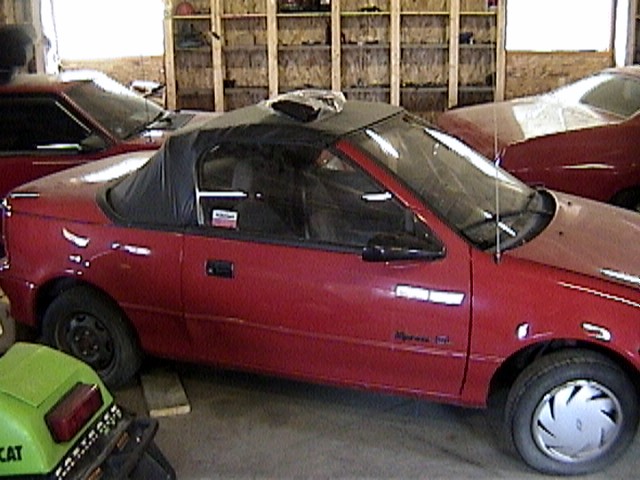
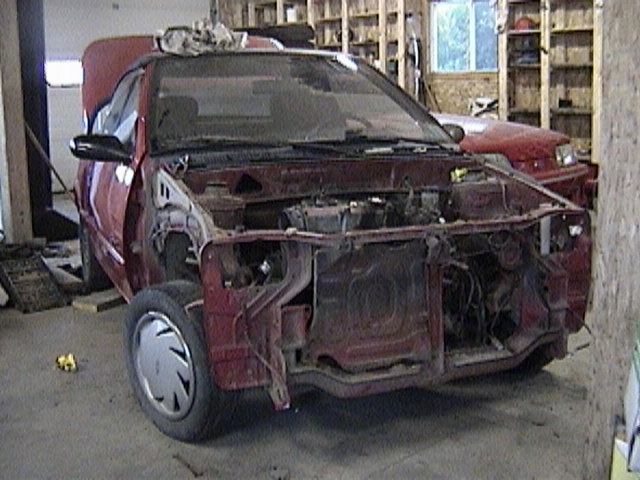
Cultus convertible. 1991
Chevrolet Sprint CL, 160,000 km. Body is very good, except the rocker
panels. Fairly new paint job, but due to the bodyman's apparent lack of
enthusiasm, the rocker panels were not replaced; merely scuffed over
and painted. (Painted with the 'ever so popular rock guarding to cover
up poor bodywork' idea in mind). Lessons learned, once bitten twice shy. .
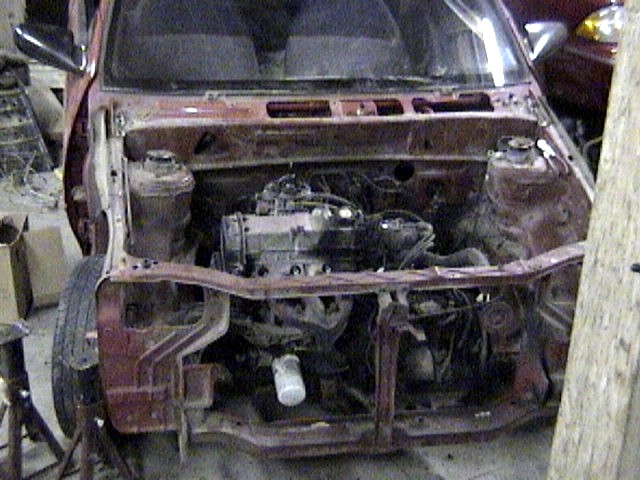
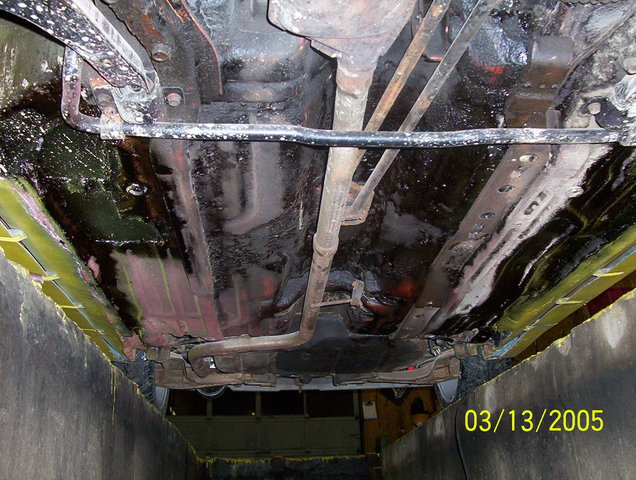
One
such problem on these cars is the (I'm assuming) lack of drainage and
the way the drivers and passenger corners of the car retains water.
Overtime, this will develop into rust, and make itself into a hole.
Pictured here is surface rust that will need to be ground out with a
wire wheel and painted. Hopefully I wont have to replace the floor in
this spot. Will update accordingly. Step
2: The Swift GS
Removed
and rebuilt up the front end parts, control arms, steering knuckles,
new front wheel bearings, rotors for use on the 'vert. Step
3: The Swift GT
I
was so wrong about sleeping in. At
1:00am, I got a phone call from work. Seems the production database
went down, and there was a stoppage of work because of it. 45 minute
drive into work, found the server needed a quick reboot, 45 minutes
drive back home, and I was dead tired. Next
morning, I borrowed my mother in laws truck, went into Bridgewater to
get the UHaul car trailer. Finally found the place, and discovered they
actually had a car dolly trailer for rent. Bonus! I thought... in the
office I went, ready to begin. Then
it all went downhill. It took the receptionist 45 minutes to enter my
license into their computer system. "Invalid license?" the receptionist
said... my jokes of "It must be all my drinking and driving charges"
didn't exactly meet a warm audience. Seems she wasn't entering a date
in the computer correctly. Out the door I went, ready to meet the
trailer. Finally. And
the skies opened with rain. To counter this, the truck decided this was
the perfect time to NOT start anymore. The starter solenoid went on
vacation from there on out. I had to crawl under the truck and cross
the starter solenoid over to get it going again, all in torrential
rains. No problem, I backed the truck to the where the trailers were. I
soon discovered in the pouring rain that the trailer hitch had a 3"
ball on it, and would no way fit the trailer. I ended up buying a new
one from a local Canadian Tire store. On
my return, I had to borrow a pipe wrench and an adjustable wrench.
Since the ball was on the truck for about 10 years, no about of brute
strength would budge it. The local mechanic had to get it red hot with
his torches before it would move. So, I was in business again. Put the
new ball on the trailer, and backed up to the trailers again. Still
raining, I hooked up the hitch, the safety chains, and discovered the
truck had no electrical hook up for the lights. This was not my day. In
disgust, and what should have been a 15 minute job, I took off for
Halifax, with my trailer in tow. No lights. When
I reached the place an hour and half later, driving straight through
Halifax and Dartmouth I might add, it stopped raining. Finally. Found
the car, but I was concerned it had a ticking valve or lifter. Also, it
looked
like when he put it in gear, there was a god-awful grinding noise. I
made a mental assessment, and if
the transmission was gone, I would use the one from my GS. As for the
ticking motor, I wasn't sure. Got
the car on the trailer, and as soon as
I pulled out of the yard, it started raining again, harder than ever.
Great... 2
hours later, got the car in my garage. I
had my GT. Finally.
After searching since May, I had it. 11/25/2003
~ Found
that the grinding and squealing described above was the exhaust rubbing
against the floor panels. Minor adjustments later, it was pretty quiet
now. Got the car off the ramps, and found that the it would drive under
it's own power. So, at least the clutch and transmission was okay!
Things definitely look up! 12/1/2003
~
What
should have been a simple 15 minute job turned out to be ugly. I
decided it was time to start putting the front end of the Sprint
together with my restored Swift parts; starting with the control arms.
Drivers side went on easily enough, but I had forgot the passenger side
was still together. Removed all bolts, freed up all that I could. What
I didn't realize was that after 13 years, rubber can become seized on
metal parts. The bushing from the original control arm wouldn't let go
of the mounting bolt. This took me 45 minutes of prying to get the
control arm out from the seized bushing. Who knew? Ready to start
cleaning the engine bay, prep it for paint before the DOHC finds it's
new home inside. Also
started to begin the removal process of the DOHC from the GT. The
engine side wiring harness is almost removed now. The rear engine mount
is cleaned and ready for paint, the right engine mount has been dipped
in my electrolytic solution for a few days now, ready to be cleaned and
painted. Almost ready to start cleaning the little odds and ends, like
the ignition coil bracket, etc. DOHC
should be ready for removal this weekend. Then it gets degreased and
cleaned up. New timing belt install, valve cover will be removed so I
can paint it. The
MK3 dash uses different mounting brackets than the older MK2. I will be
removing my other 2 mounts from the white GS and installing them on the
Sprint. Another concern is whether I can use the front assembly from
the GS with the GT axles. I already rebuilt the front using the GS
parts, (cleaned, painted, new wheel bearings). Both cars are 1992 MK3
models, hopefully they share the same axle/hub spindle gear. 12/22/2003
~ Not
much new to report. The GT put up a great struggle, but by using my
father's wisdom (never force, just use a bigger hammer), the axles are
out, engine bay harness is disconnected, and the only thing left is to
remove is the exhaust. We've been having an unseasonably warm (rainy)
winter so far, and I'm pushing to get the motor removed and into a
heated garage to work on it. Should be out tomorrow or during the Xmas
holidays. GT
and GS axle assemblies are not swap friendly, (GT splined shaft will
not fit the GS hub and vice versa). Next step is to see if I can
machine and rebuild the GT rotors, and fit the hubs into the freshly
rebuilt GS knuckle assembly. If possible, I'd like to get some use out
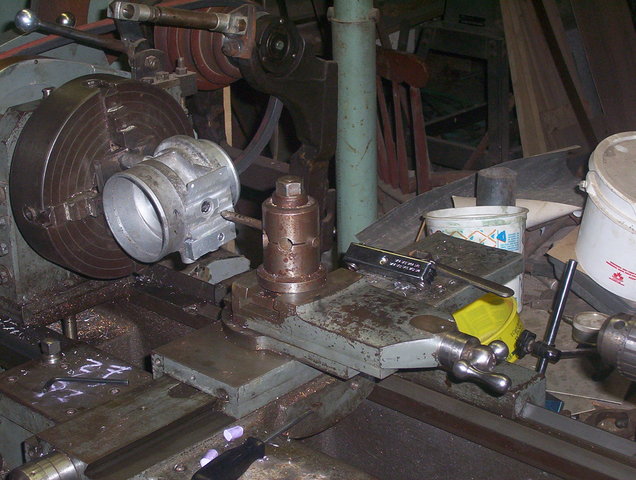
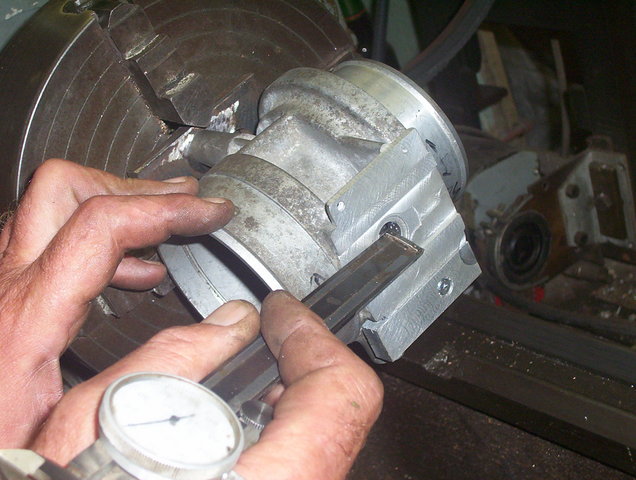
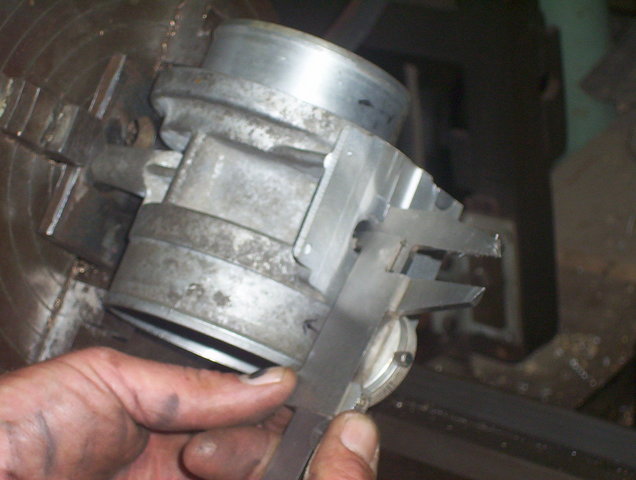
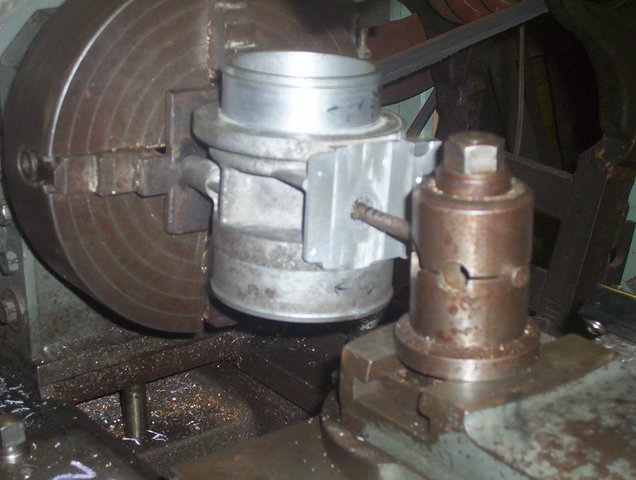
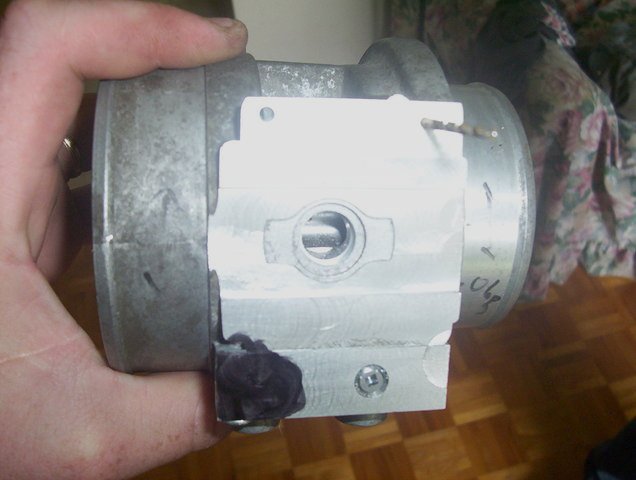
of the new wheel bearings. Purchased
a AFM housing from TGstring in
Ontario. Will clean this up and machine it to 49mm, up from the stock
45mm. Other
minor parts cleaning and prepping is going according to plan. The GS
and GT share the same motor and transmission mounts, so I have those
ready. Rust removed and freshly painted now. As well as the mounting
brackets for the coil. 12/26/2003
~
DOHC
motor is finally out, ready to take it to the heated garage where I'll
be cleaning it up with engine degreaser. The GT axles are quite a bit
beefier, but in the process I think I ruined the passenger side axle.
But the GS axles will fit perfectly in the transmission. Might try the
GS axles, and fix up the GT 14" rotors for now. 12/30/2003
~ Decided
to use the left and right driveshafts from the GS on the GT; so long as
I limit the tire spinning and smoke shows, I think the shafts and CV
joints will handle it. Trying to source a new center shaft bearing now.
I'm not fussy over how the original feels; it's a little sloppy.
Finished re-assembling the other GS knuckle/hub/wheel bearing too. Have
the motor/tranny cleaned up a little, at least the high spots. Have 3
broken bolts to attend to from the rear engine mount bolts into the
block. 12 year old rusted bolts... not much to say here. Soon as they
are out, my restored mounts will go on. GT
rotors are done bathing in my electrolysis. They're ready to be turned
down on the lathe, then painted. MAF mounting brackets are now
in-process of the cleansing. Aside
from above, basic plan of attack is to put the front steering assembly
back on the 'vert and get it outside where I can grind and finish
repairs to the engine bay. Weekend of Jan. 3 possibly... 1/3/2004
~
Got
the flu, feeling terrible. Managed to go out and remove the seized rear
mount off the motor, and the 3 snapped bolts. Removed center shaft
bearing and oil seals, waiting on new parts. Restored the center shaft
mount (cleaned and painted). Also installed passenger side steering
knuckle assembly. GT rotors are at my fathers now being lathed
down. 1/11/2004
~
Didn't
do much this weekend. Myself, my wife Cindy, and both kids have the
flu. Kids were running temperatures of 102 - 104, everyone is feeling
terrible. Am converting the center shaft bearing to a more generic
brand; will document the process for anyone to look at here. More
details to follow. 1/18/2004
~
The
bearing replacement will be built up this week. Depending on it's
success rate, I'll document it later. Starting gutting the interior of
the GT in attempts to retrieve the wiring harness intact. The
transmission mounting is a little trickier. I'm not happy with the way
the convertible front frame is turning out, so I am removing part of
the GS frame and grafting it on the convertible. Spent this afternoon
removing the GS frame, will work at removing a section of the
convertible frame this week. This should finalize the engine bay work,
and will be ready for priming and painting. 1/21/2004
~
Tranny
mount frame piece removed from the GS, and the convertible frame is cut
to accommodate the patch. Need to roll the car out to the other garage
and mig weld the patch in place. As you can see, the patch I cut out
has mounting bolts welded in the back, the convertibles piece didn't.
(Was unhappy with the way the frame looked after I removed the old
mount, so this should make it better all around). My
second GT motor (from Craig in Brampton) will be here this weekend.
Saving it for possible turbo application later. Other parts are on the
way, more details when they arrive. 1/27/2004
~ Past
weekend was too cold (-35C with wind chill) for any welding. I did
remove my valve cover, stripped it, and painted it. (Had to keep busy
indoors somehow :) Used some vile chemical spray to remove the paint
(aluminum safe), washed it down, scrubbed it with steel wool, and
painted with high temperature brake caliper paint. 2 days, picking away
at it. Will
be addressing the frame this week
sometime. The other motor also finally arrived, as promised! 1/28/2004
~ Valve
cover put back on, some minor work to
the frame patch. 1/31/2004
~ Bought
new bolts for the front end assembly yesterday while in Halifax. Moved
the car to the big garage for frame welding. One small patch to weld in
place yet, then cosmetics to do before finish sanding the engine bay. 2/5/2004
~ Grind
the patch welds, last minor patch
ready for welding, begin interior trim recolor process. 2/11/2004
~ Both
kids are starting to get the flu, which usually means Cindy and I
aren't far behind to get it. Since the weather was cooperating too,
this was the best time to get the car back into the other garage to
finish welding up the frame. Car moved back into the other garage now,
waiting further orders. Most of the bay is now lightly sanded, will
pressure wash it out and tackle the front. Be a good time to use a seam
sealer around the replacement frame piece and the patches. Still
working on the interior trim pieces too. About
the interior pieces... lightly sanded with wet 400 grit, 3 coats
primer, sanded with 600 wet, now ready for the top coat. Take my
advice: do NOT wimp out and buy the El Cheapo brand spray paint like I
did. I bought a $6 can, and it shot out like it was diarrhea. It
splattered and spit everywhere, made a muking fess of it. After sanding
that down, I ended up using my leftover $12 yellow brake caliper paint.
MUCH better... no glossy finish to it either. Even spray patterns. 600
wet sanded between coats (3 coats I think I used). Next up, clear
coating. 2/17/2004
~ Nothing
exciting, more interior trim bits
done. Getting over the flu, soon to be back out in the garage sanding
again. 2/22/2004
~ Last
phases for sanding nearing completion; washed everything down. Patch is
almost completely sealed up with Liquid Metal. Need just a bit more for
underneath. Last bit of the interior, (dash mounted vent; driver's
side) is proving to be a needle in a haystack. May end up repairing the
one I have, painting to match. Coming
up, primer paint in the engine
bay. 2/23/2004
~ Liquid
Metal sanded down smooth, touched up the last parts of the engine bay,
(last minute sanding, rust removal from a few seams). Need to bath the
whole bay one last time before starting the priming process. 2/25/2004
~ 2
coats of primer... 2/29/2004
~ ...and
2 coats of paint later, finally have
something to work with here. Step
4: Putting it all back together... Various
stages of assembly. 3/26/2004
~ Time
to fish or cut bait. Motor getting put
in finally; will have to deal with the new parts when they arrive. 4/5/2004
~ Good
idea: swap fuel pumps. Bad
idea:
get tank out, pump swapped, bolted back into place, and forget about
feeding wiring back up through body beforehand. What a PITA. No wonder
I'm hateful at work with only 3.5 hrs sleep. 4/6/2004
~ New
parts arrived! 4/7/2004
~ Getting
her ass in gear. 4/13/2004
~ Been
working at a crazy pace lately, not much time for updates. I ran into
serious problems with my engine mount. Seems that I didn't realize that
the 1.0L engine mount is pushed back from the front grill by about an
inch or so as compared to the 1.3 mounts. Had to take out the motor
again, drill out the MIG weld, move it into place, and MIG it back
again. Motor is dropped in again, though it was still a shoehorn
fitment. Underdrive pulley was installed when I had the motor out.
Engine bay is wired up now, and the driver's side driveshaft is now in.
Mechanically, I should be set to fire it up this week. Other
driveshaft, shift linkage, gas tank filler tube should easily be done
tomorrow night; new fluids, and we'll see what happens after we turn
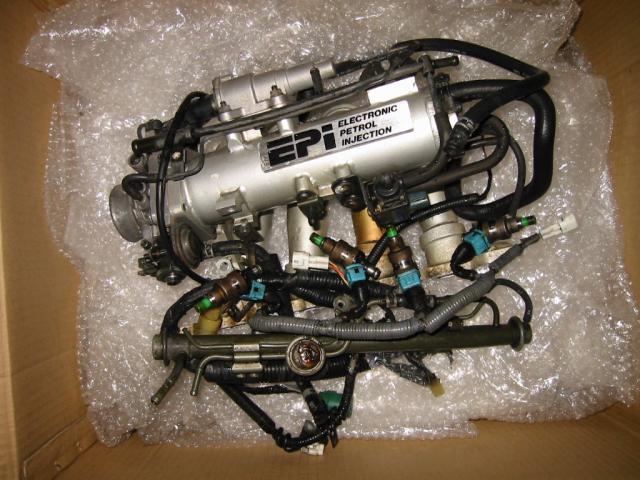
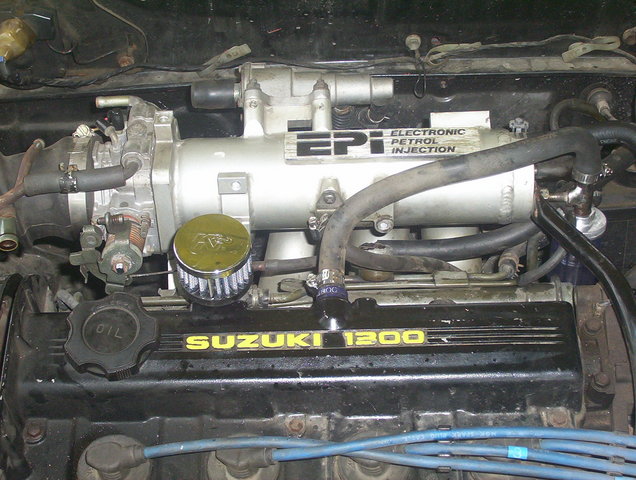
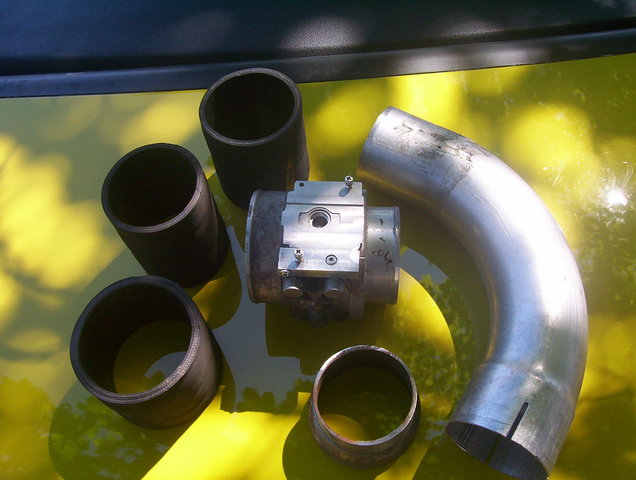
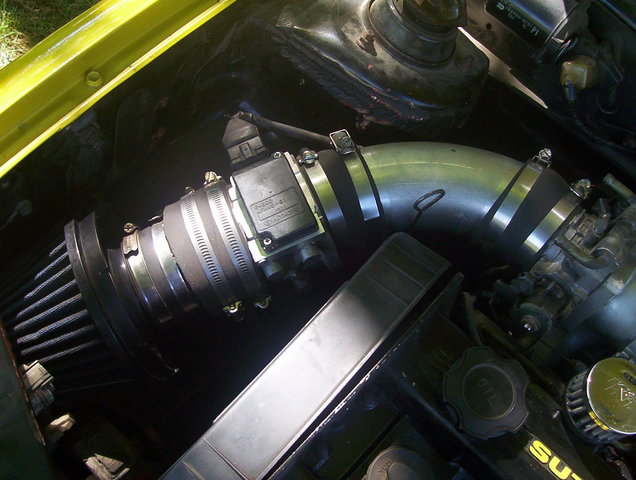
the key. Pics
of the ported/polished intake manifold
and filter that will be installed! 4/15/2004
~ Usual
odds and ends done up. A few stray wires hooked up under the hood, rad
is now in, passenger driveshaft is in (noticed a sloppy fit on the
intermediate shaft. Plan to use Loctite 660 on it to hold it in place.
I'll do this when the intake manifold is off and being swapped for the
ported/polished one; next week maybe?) New alternator belt, battery
charged up, instrument cluster installed, turned the key,
and............ nothing. No power at all; did some troubleshooting.
Finally got power circulating to the dash now. Just need time for more
troubleshooting, nothing too major here. Also,
finally got a pair of GT seats from
Ontario! Big thanks to Morgan and Jarrod! Should be here by early next
week. 4/21/2004
~ Loose
ends tied up now. Engine fully wired, gas in the tank, battery
charged... motor turns over like a champ. Now the fuel lines from the
tank decided to let go. Have to drop the tank again and replace the
lines. (I *KNEW* I should have done this when it was off before.......) 4/25/2004
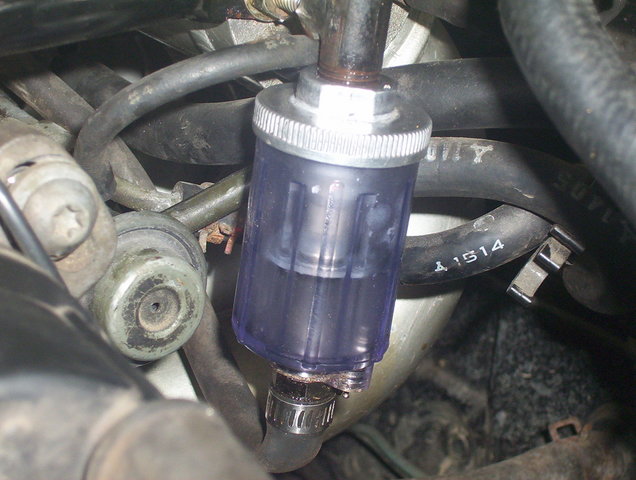
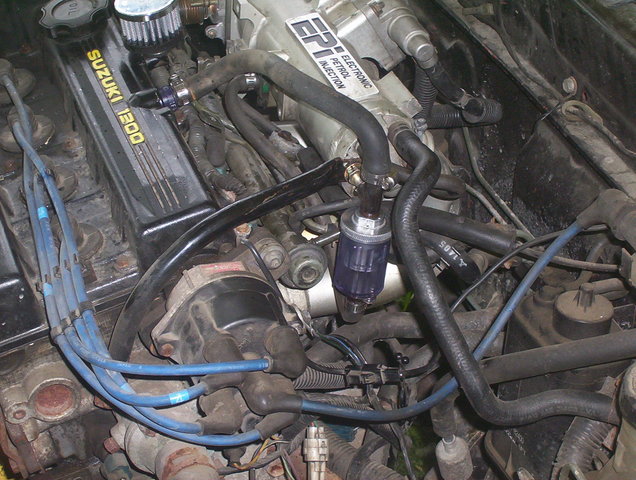
~ Lines
replaced, as is a new fuel filter. The filter bracket was a bit dodgy,
had to be a little creative getting it back in shape. Once this was
finished, confirmed there were no leaks from the new hoses, turned the
key and the motor roared to life... it is a good day :) New
muffler is on it's way from Ontario. Will start sand bending up my 2
1/4" exhaust this week, as well as run the rear wiring back in the car.
(Replacing old MK2 with newer MK3 wires. It should prove easier than
splicing into the older wiring). 4/28/2004
~ Front
rotors and calipers changed to much bigger GT model. Bought 3" air
filter, fenders back on, front clip bolted on. Old automatic
transmission mount bracket is interfering with the shift linkage. Time
to get out the grinder. 5/2/2004
~ More
odds and ends finished up. Clutch cable hooked up, brake booster hooked
up, still have to bleed the brakes. Rear wiring is finished now. There
was some 'custom' wiring done to my foglights and rear lights by the
previous owner; that is all sorted out now back to stock condition.
Have a minor issue to sort out with the headlights, low beam isn't
working just yet; and I need to replace a foglight bulb. The UK lights
are on, that required a bit of minor surgery, and bulbs crafted up with
the right plug. As
soon as the brakes are bled and working
correctly, I'll start the muffler creation, I promise! 5/19/2004
~ Been
awhile, I know. Busy with some other work, haven't had much of a chance
to get out to the garage. Still working on getting the piping done, got
the last of the odds and ends today. Something should be crafted up
shortly. 6/6/2004
~ New
tires arrived from BC (Kumho 195/45/15 Ecsta), mounted on aluminum
wheels, lowered springs. Custom yellow instrument dials and needles
installed. Cams removed to be built up to similar to a BD10/BD14 hybrid
spec, Cultus intake manifold bought from
Singapore. Rear UK foglight
piece in too. Yes,
have been putting off the exhaust.
Will be finished using sand bending technique http://www.teamswift.net/forum/viewtopic.php?t=7648
Monday night. After which comes Operation
Rockerpanel Rebuild! 7/21/2004
~ Been
awhile; have been super busy with more work then I can handle, family
stuff, etc. Substituted the 2.5" exhaust with 2" (started second
guessing myself a bit). Cultus intake is a no go for now, but I have a
ported/polished intake with Nissan 60mm throttle body ready to be put
on. Bigger cams are now installed. New Raid steering wheel from
Austria, European style instrument cluster (240km/h; 9000 rpm variety).
Getting another set of yellow dials for it, as well as an unexpected
item, a valve cover plate. Thanks Gerry :) Given
my workload these days, and lack of time to commit to the vert, looks
like I may end up taking this to a bodyshop for the rockers, floor and
paint. Been quoted at $3K, so I am balking a bit. I think I can squeeze
a place for $1.5K, but that would be pushing my luck. In the meantime,
I'll continue to pick at it, though progress is slowing down. 9/13/2004
~ Ok,
after a rather hectic summer, I finally have time to finish the
convertible. I have a paint guy lined up to do the convertible; this is
scheduled for Oct. 1, to be ready in 4-6 weeks. (Ironically, just in
time for winter!) Have been busy this month frantically getting the
interior finished up. Have not had time to tune the car with the new
ported/polished intake and 60mm throttle body, so I'm back to stock for
now. The
vert saw the road earlier this month for a shakedown test, see where I
am in respect to weird noises, vibrations, etc. This week will see new
rotors, new CRX brake calipers, new Hawk pads, a rewound alternator and
a new battery. Final action items include finding the fog light wiring
to hook up the rear UK foglight piece, mig welding the rear sway bar
and finally fixing up the rear bumper mounting system. Oh,
for paint, I am strongly considering 2004/05 Ford Mustang Screaming
Yellow/D6: ALBZ-19500-7109A. You can see a nice picture here of the
color: http://www.yellowmustangregistry.com/carphotos/05/ylw05GT.j 10/3/2004
~ New
CRX calipers/rotors fitted on the stock Sprint hubs was a little bit of
a challenge. A lot of Honda/Acura calipers will indeed fit the Swift GT
hubs, but the Sprint hubs are oh so slightly different. The GT rotors
become too big when trying to fit the bigger Honda calipers, and the
stock Sprint rotors are too small for the pads. Had to split the
difference here. New GT rotors were put on the metal lathe, and voila.
The pads needed some ultra fine tuning with the angle grinder, namely
the bottom part of the metal bracket needs a slight adjustment. Just
don't grind the actual carbon pad itself. Clear as mud? Excellent... Car
is successfully delivered to Stephen Henley in Riverport. (Thanks again
Ricky! Appreciate the help on that one!) Stephen is a really good
friend of mine that I've known since starting my current work (10+years
I think). I'm in no rush for the car, so Stephen is cool to pick away
at it with no set deadline. The project has been on-going since May of
last year, and I'll end up storing the car in the garage during the
winter months anyway. I can be patient a little longer. BIG thank you
to Stephen and his family there, had a lot of laughs! Great people!
(Mmmm... The deer sausage was most excellent!) I'll
be dropping in once in awhile to help out if I can, take pics, and show
the progress here. Finally beginning to see the light at the end of the
tunnel here! 10/12/2004
~
Bodywork
is in full swing now. Driver side rocker panel is being reconstructed,
car is semi-gutted once again for bodywork. Trunk lid, hood, doors,
wheels are off; antenna mount shaved off, sanding is in progress.
Stephen and Aaron are doing an awesome job. 10/20/2004
~ Passenger
side floor, areas around the door switches, rear vent, passenger rocker
panel needed rebuilding. Bodywork continues with the passenger door
dents now pulled, rear fender and hood dents filled, skirts are
fiberglassed up, the sanding continues. She's looking better all the
time! 10/29/2004
~ Stephen
and Aaron have been doing a bang-up job prepping the car. 99% of the
sanding done, door switch mounting holes covered, side skirt railing
welded in, brackets for the rear light center section in, and mostly
all primered. Paint is pretty much ready to go on... 11/3/2004
~ Showed
up this evening to assemble some panels (after an awesome feed of BBQ'd
ribs and potato salad... Yum!). Door jams painted up, inside hood and
truck lid done as well as the rockers. Everything is pretty much back
on and in place for the final spray, possibly as early as next week.
Again, excellent work done by Stephen, I can't say enough about the
attention to detail he's putting into it. 11/17/2004
~ New
paint is on, and with a few minor places to touch up, we are ready to
re-assemble! Speedy Autoglass put the schedule
behind a bit on a
rather great play of incompetence; and an early winter storm caught
everyone off guard. 20" of snow in fact. 11/23/2004
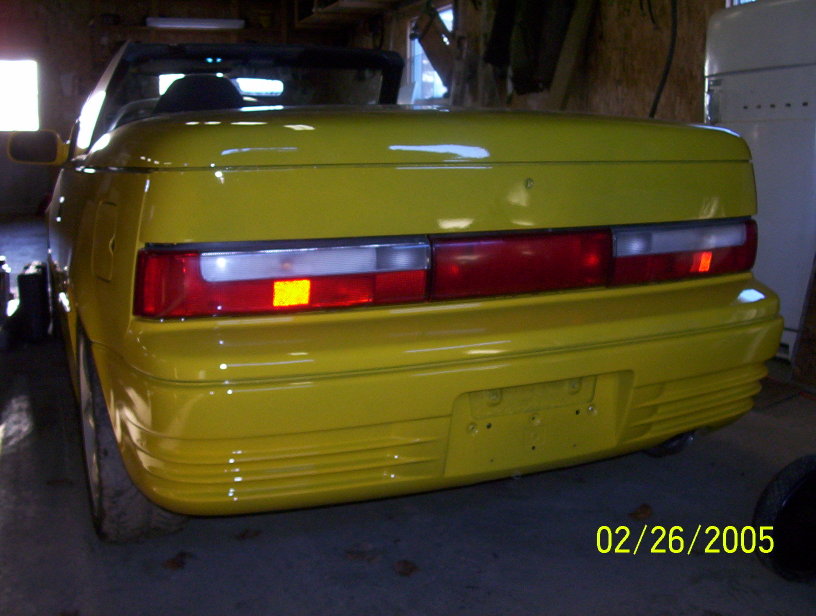
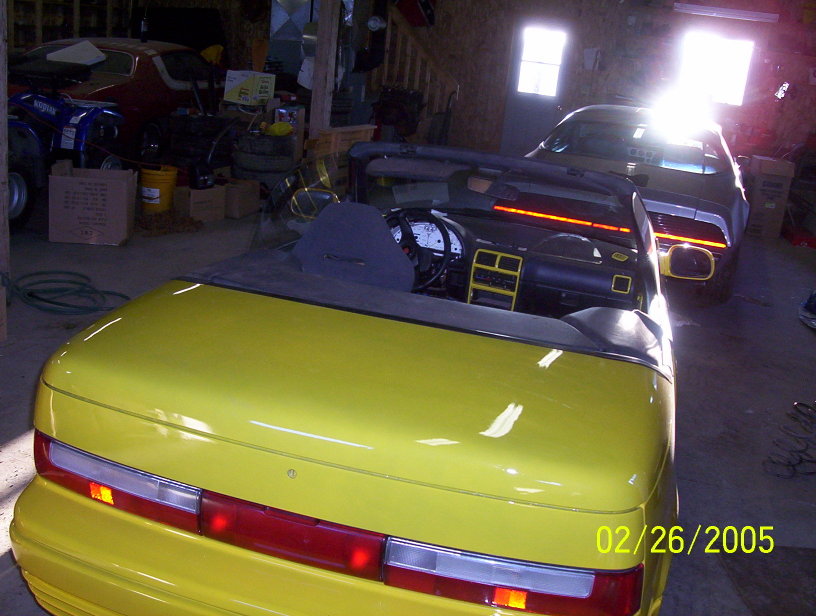
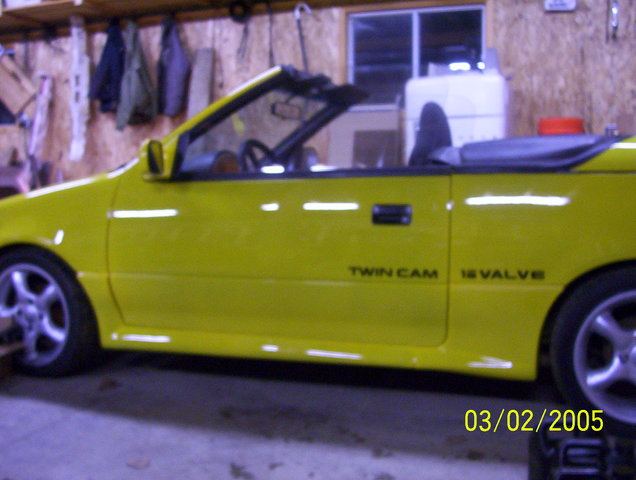
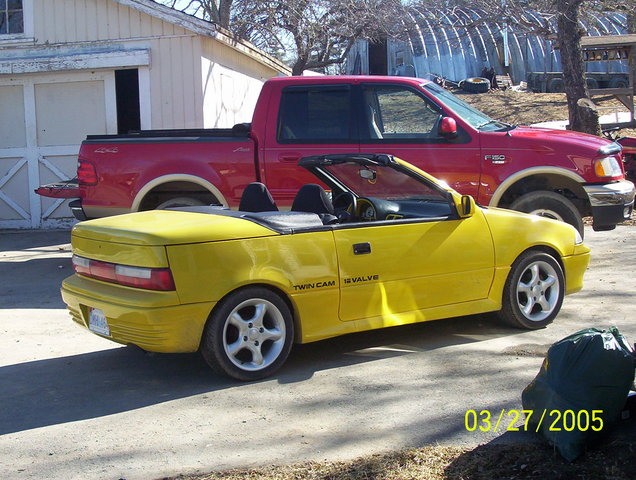
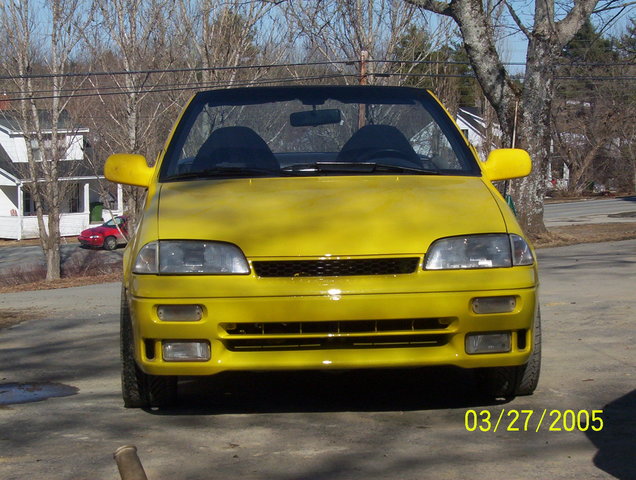
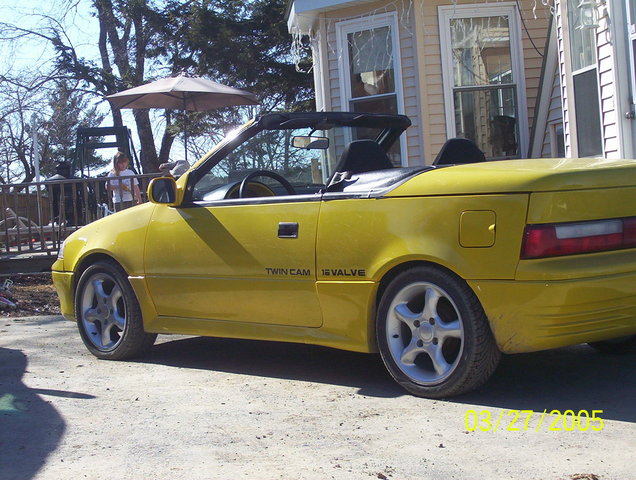
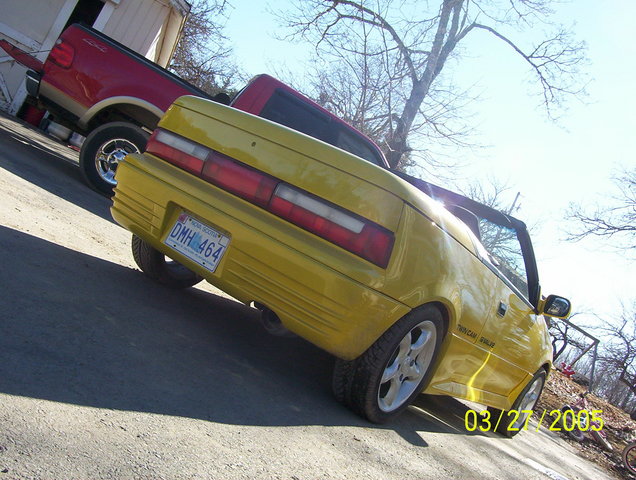
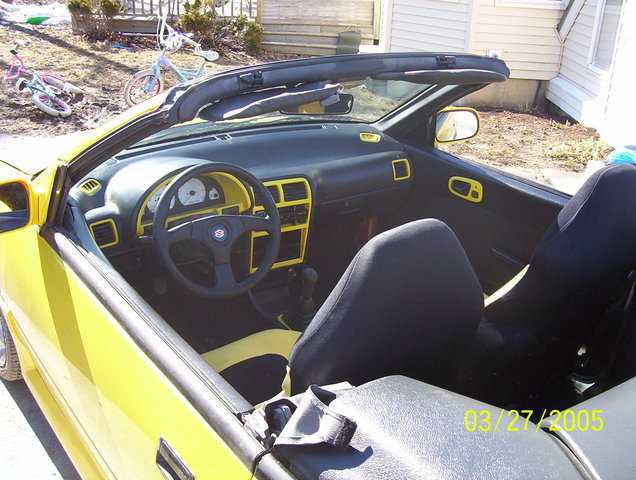
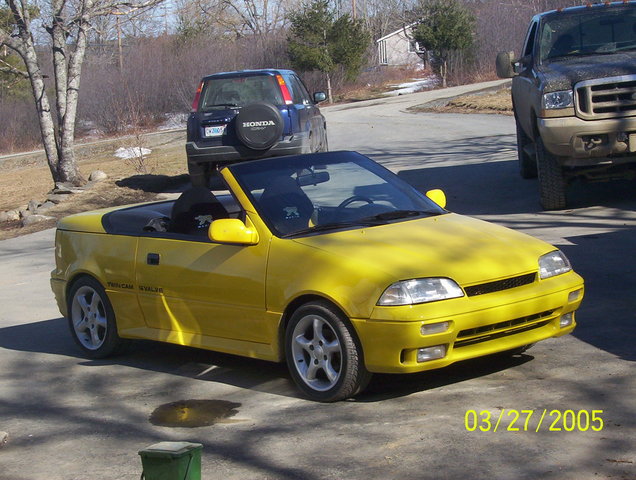
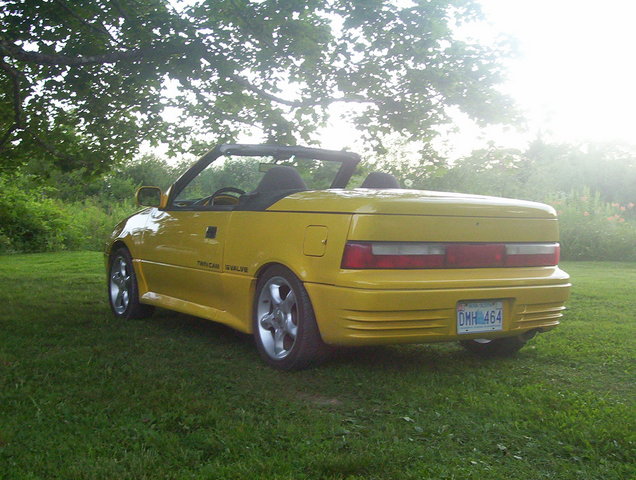
~ At
long last, it is time to finish this saga. Final coat of clear coat is
on, tape is off, everything put back in, rear sway bar is welded in. 19
months of work, blood, sweat and of course tears has brought us what
the Suzuki convertible *should* have been from the factory. Here's the
pics from the final photoshoot... Also
added was the rear sway bar from the GT. The mounts were cut out of the
floor from the GT, ground to a respectable size, snapped bolts were
removed, and was installed by Stephen. An unexpected twist I'm sure he
didn't see coming, but I appreciate that he did it for me there. Thanks
bro! 12/27/2004
~
Cultus intake manifold, injectors, throttle body, fuel rail,
and stock hoses bought from a contact in Malaysia. Should be here in
February. 1/5/2005
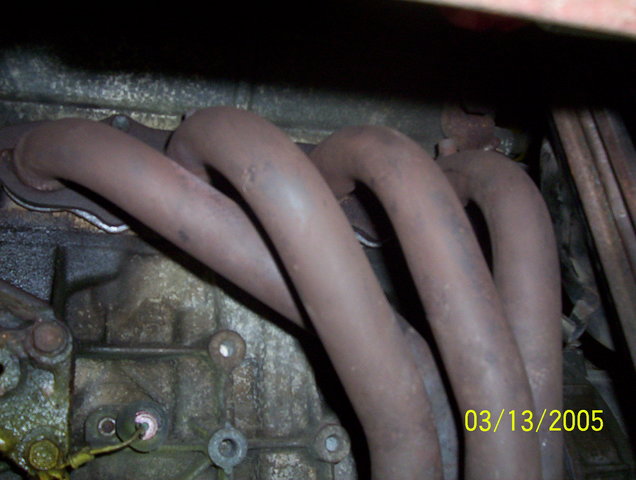
~
Fitting in Cultus extractors, first on spare motor to ensure
correctness. Had to make a new bracket to help secure the headers to
the motor.
![]()
![]()
![]()
![]()
![]()
![]()
Step
1: Stripping the Sprint
 Working
on these cars is a lot of fun. If you have a 10mm, 12mm and a 14mm
wrench and socket, you can pretty much strip the car clean.
Working
on these cars is a lot of fun. If you have a 10mm, 12mm and a 14mm
wrench and socket, you can pretty much strip the car clean.
")
")
")
")
")
")
")
") Since
I am swapping the automatic transmission to the 5 speed, the clutch
cable will need to be fed through the firewall. These pictures show the
mounting hardware factory installed on the firewall. Will have to drill
and cut the firewall sheet metal from the cable and bolt holes.
Since
I am swapping the automatic transmission to the 5 speed, the clutch
cable will need to be fed through the firewall. These pictures show the
mounting hardware factory installed on the firewall. Will have to drill
and cut the firewall sheet metal from the cable and bolt holes.
") The
Suzuki Swift is not a plentiful vehicle in Nova Scotia. My whetted
appetite for Suzuki cars grew more and more, my hunt for the GT seemed
grew more and more ferocious every day. Since May of 2003, searching
high and low, I found nothing local until July, where I found this
white GS. Happened to be the car of a guy that I actually work with.
So, $250 and a 15 minutes tow job later, I had my first official Swift.
150,000 km, burnt out clutch, 1.3L SOHC 5 speed. It's a 1992 MK3 style.
I was originally planning on buying a new clutch for it, and putting
the motor and tranny in my convertible, swapping the front and back
clips for my retro Cultus convertible project. It wasn't a GT, but it
was a start.
The
Suzuki Swift is not a plentiful vehicle in Nova Scotia. My whetted
appetite for Suzuki cars grew more and more, my hunt for the GT seemed
grew more and more ferocious every day. Since May of 2003, searching
high and low, I found nothing local until July, where I found this
white GS. Happened to be the car of a guy that I actually work with.
So, $250 and a 15 minutes tow job later, I had my first official Swift.
150,000 km, burnt out clutch, 1.3L SOHC 5 speed. It's a 1992 MK3 style.
I was originally planning on buying a new clutch for it, and putting
the motor and tranny in my convertible, swapping the front and back
clips for my retro Cultus convertible project. It wasn't a GT, but it
was a start. ")
")
")
")
")
")
")
") Having
a father that is into metal working is a godsend. Here you can see him
turning down my rotors on his metal lathe. He also gets credit for
removal of my old wheel bearings using his huge hydraulic press. He's
been one of the driving forces behind me in this work; as he comes from
the old school of auto and motorcycle mechanics guild. His prior work
includes mostly VW vans, dune buggys, and Harley Davidson dreams. He
also has an interesting BSA project on the go as well.
Having
a father that is into metal working is a godsend. Here you can see him
turning down my rotors on his metal lathe. He also gets credit for
removal of my old wheel bearings using his huge hydraulic press. He's
been one of the driving forces behind me in this work; as he comes from
the old school of auto and motorcycle mechanics guild. His prior work
includes mostly VW vans, dune buggys, and Harley Davidson dreams. He
also has an interesting BSA project on the go as well. ") In
November of 2003, I decided that if my Cultus 'vert project was to
really begin, I needed to clear out my garage. The only problem was
that there was my brother's 1977 CJ Jeep project there. After much
debate, I ended up selling it to a guy in Halifax. This really broke my
heart to see the Jeep go. But in the process of advertising it on http://pub45.ezboard.com/bnsjeep,
I mentioned I was shopping for a Swift GT. In a stroke of good luck, a
reply came back that someone knew where there was a '92 GT parts car
for sale. One thing led to another, and I ended up selling the Jeep,
trading my 1.3L SOHC motor from my GS above, and buying the GT for $500.
In
November of 2003, I decided that if my Cultus 'vert project was to
really begin, I needed to clear out my garage. The only problem was
that there was my brother's 1977 CJ Jeep project there. After much
debate, I ended up selling it to a guy in Halifax. This really broke my
heart to see the Jeep go. But in the process of advertising it on http://pub45.ezboard.com/bnsjeep,
I mentioned I was shopping for a Swift GT. In a stroke of good luck, a
reply came back that someone knew where there was a '92 GT parts car
for sale. One thing led to another, and I ended up selling the Jeep,
trading my 1.3L SOHC motor from my GS above, and buying the GT for $500.
")
") Getting
the car was an adventure actually. Starting out, I had to take a
Thursday off from work in order to get the car. Wednesday night, I was
in the garage cleaning up, getting ready for the car, and finally went
to bed at 11:30pm; thinking that I would sleep in a little before
starting out for the car (2 hour drive).
Getting
the car was an adventure actually. Starting out, I had to take a
Thursday off from work in order to get the car. Wednesday night, I was
in the garage cleaning up, getting ready for the car, and finally went
to bed at 11:30pm; thinking that I would sleep in a little before
starting out for the car (2 hour drive). ") Looking
it over, it's been painted 4 times,
had a different roof and cracked frame. I mean, the frame was totally
cracked though. 3 days later, I had bought fresh oil for it, (looked
like it was never changed before), new filter, new Bosch platinum spark
plugs, and a liter of automatic transmission fluid. Changed the oil,
put in the transmission fluid in the crankcase, charged up a battery,
put the new plugs in it. The motor sparked to life, and fifteen minutes
of coaxing, the tick finally was gone. It purrs like a kitten now!
146,000km on it, and it was ready. Though, since my time in the garage
is limited from 10pm until 1am or 1:30am, I don't think the neighbors
appreciated me revving my DOHC at midnight, trying to get that tick
removed... :-)
Looking
it over, it's been painted 4 times,
had a different roof and cracked frame. I mean, the frame was totally
cracked though. 3 days later, I had bought fresh oil for it, (looked
like it was never changed before), new filter, new Bosch platinum spark
plugs, and a liter of automatic transmission fluid. Changed the oil,
put in the transmission fluid in the crankcase, charged up a battery,
put the new plugs in it. The motor sparked to life, and fifteen minutes
of coaxing, the tick finally was gone. It purrs like a kitten now!
146,000km on it, and it was ready. Though, since my time in the garage
is limited from 10pm until 1am or 1:30am, I don't think the neighbors
appreciated me revving my DOHC at midnight, trying to get that tick
removed... :-) ") 12/7/2003
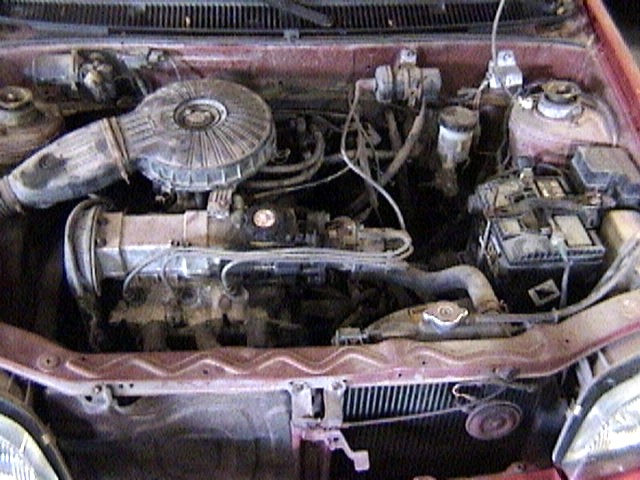
~ Majority
of the engine bay is now sanded. Still have the front and inner fenders
to sand down. Removed the left front transmission mount, (the other
mounts are compatible for the DOHC.) Planning on fabricating a new
mount from angle iron to be used to replace the original. Should be
ready to start priming the entire front clip and engine bay by the
weekend.
12/7/2003
~ Majority
of the engine bay is now sanded. Still have the front and inner fenders
to sand down. Removed the left front transmission mount, (the other
mounts are compatible for the DOHC.) Planning on fabricating a new
mount from angle iron to be used to replace the original. Should be
ready to start priming the entire front clip and engine bay by the
weekend. ")
")
")
")
")
")
")
")
")
")
")
")
")
")
")
")
")
")
")
")
![]()
")
")
")
")
")
")
")
")
")
")
")
")
")
")
")
")
")
")
")
")
")
")
")
")
")
")
")
")
")
")
")
")
")
")
")
")
")
")
")
")
")
")
")
")
")
")
")
")
")
")
")
")
")
")
")
")
")
")
")
")
")
")
")
")
")
")
")
")
")
")
")
")
")
")
")
")
")
")
")
")
")
")
")
")
")
")
")
")
")
")
")
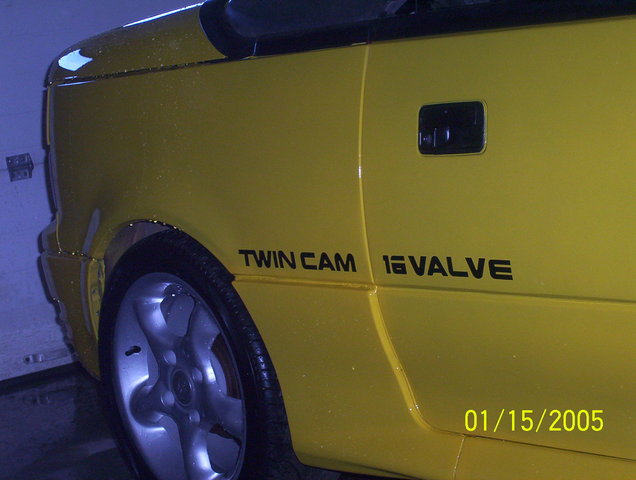
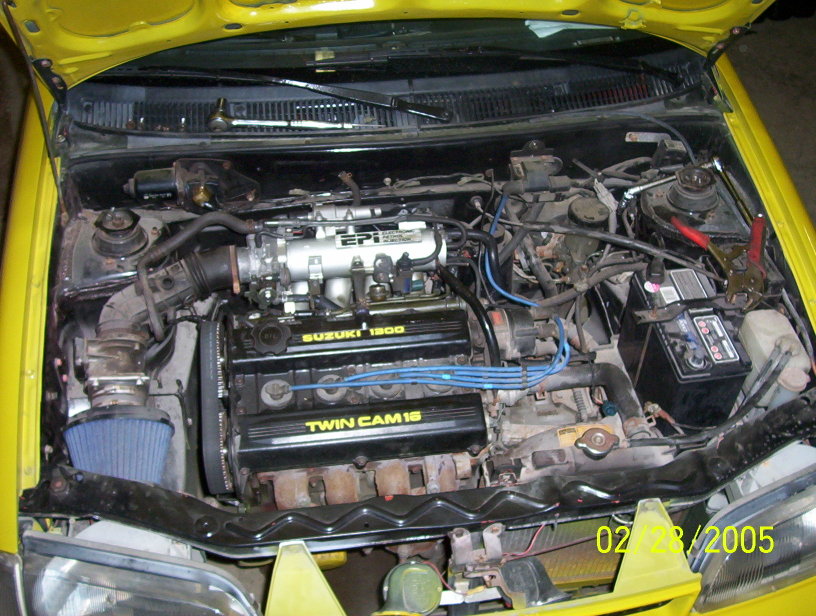
1/17/2005
~
Washed car, put on side decals. Have some minor electrical gremlins to
work out along the way.

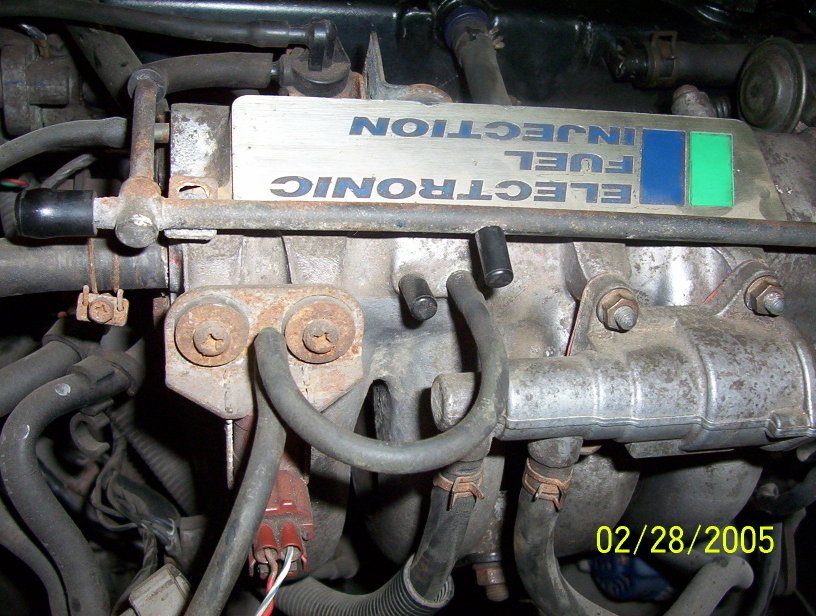
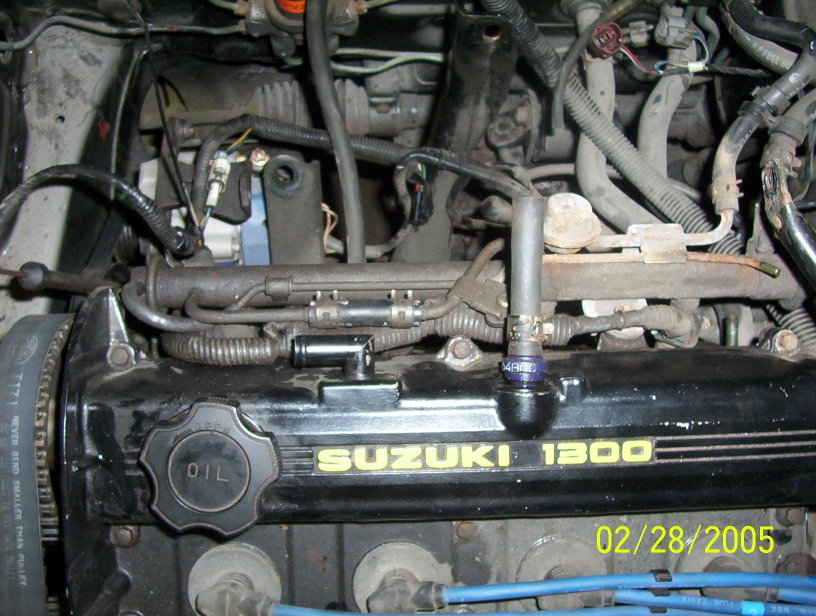
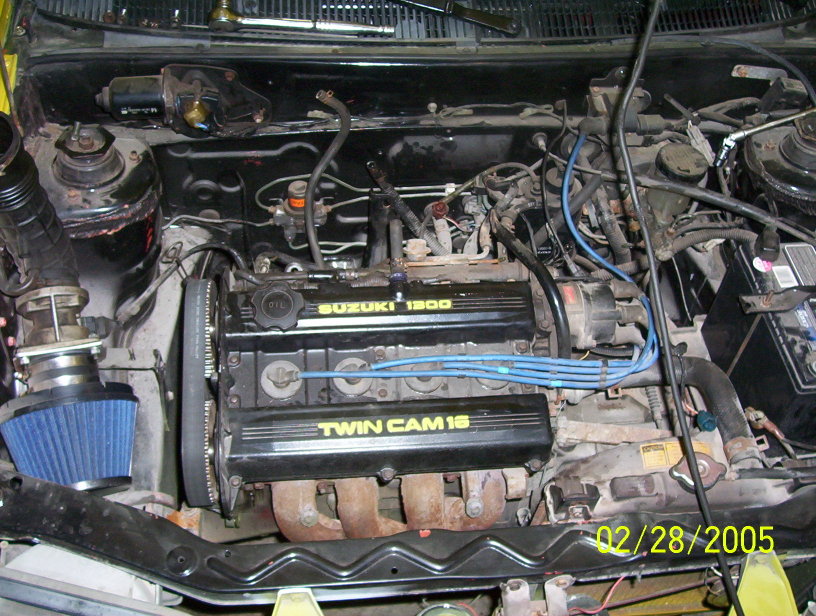
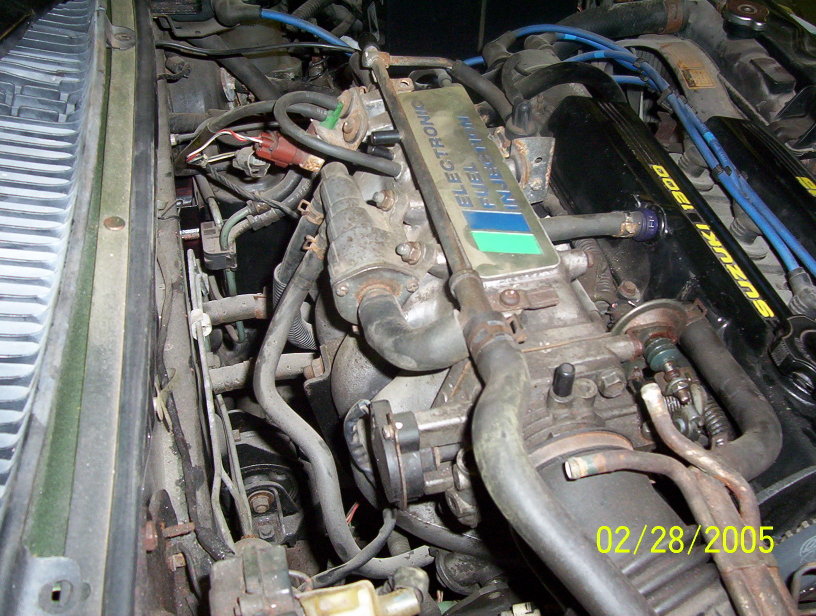
2/28/2005
~
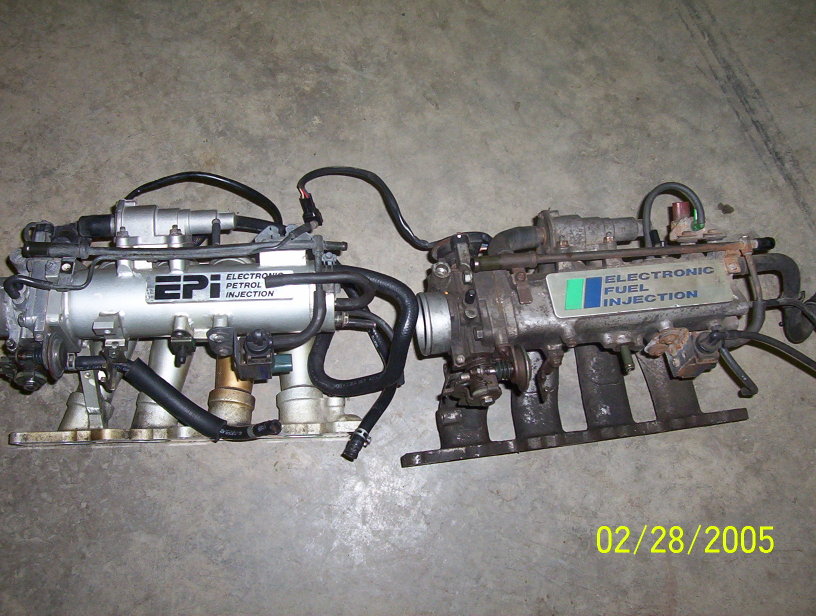
Ok, not much progress lately. Been busy on the side with some freelance
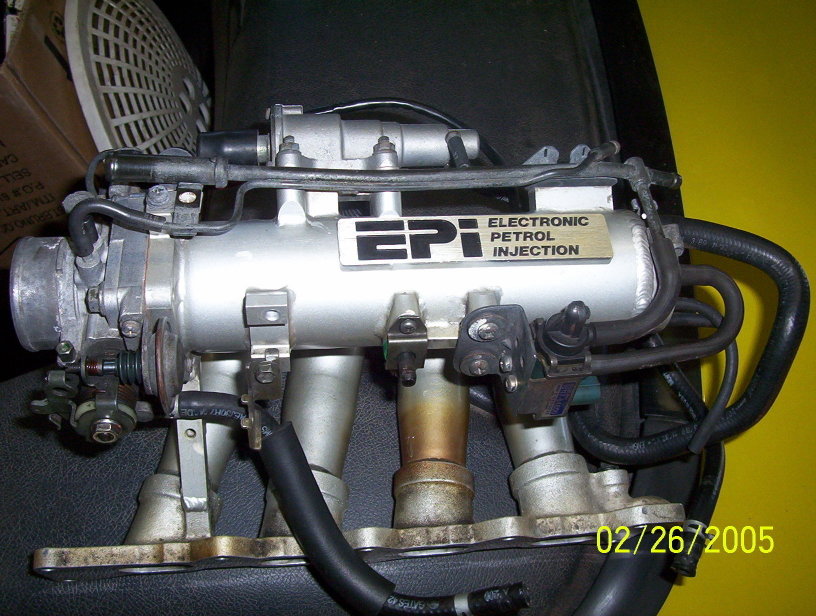
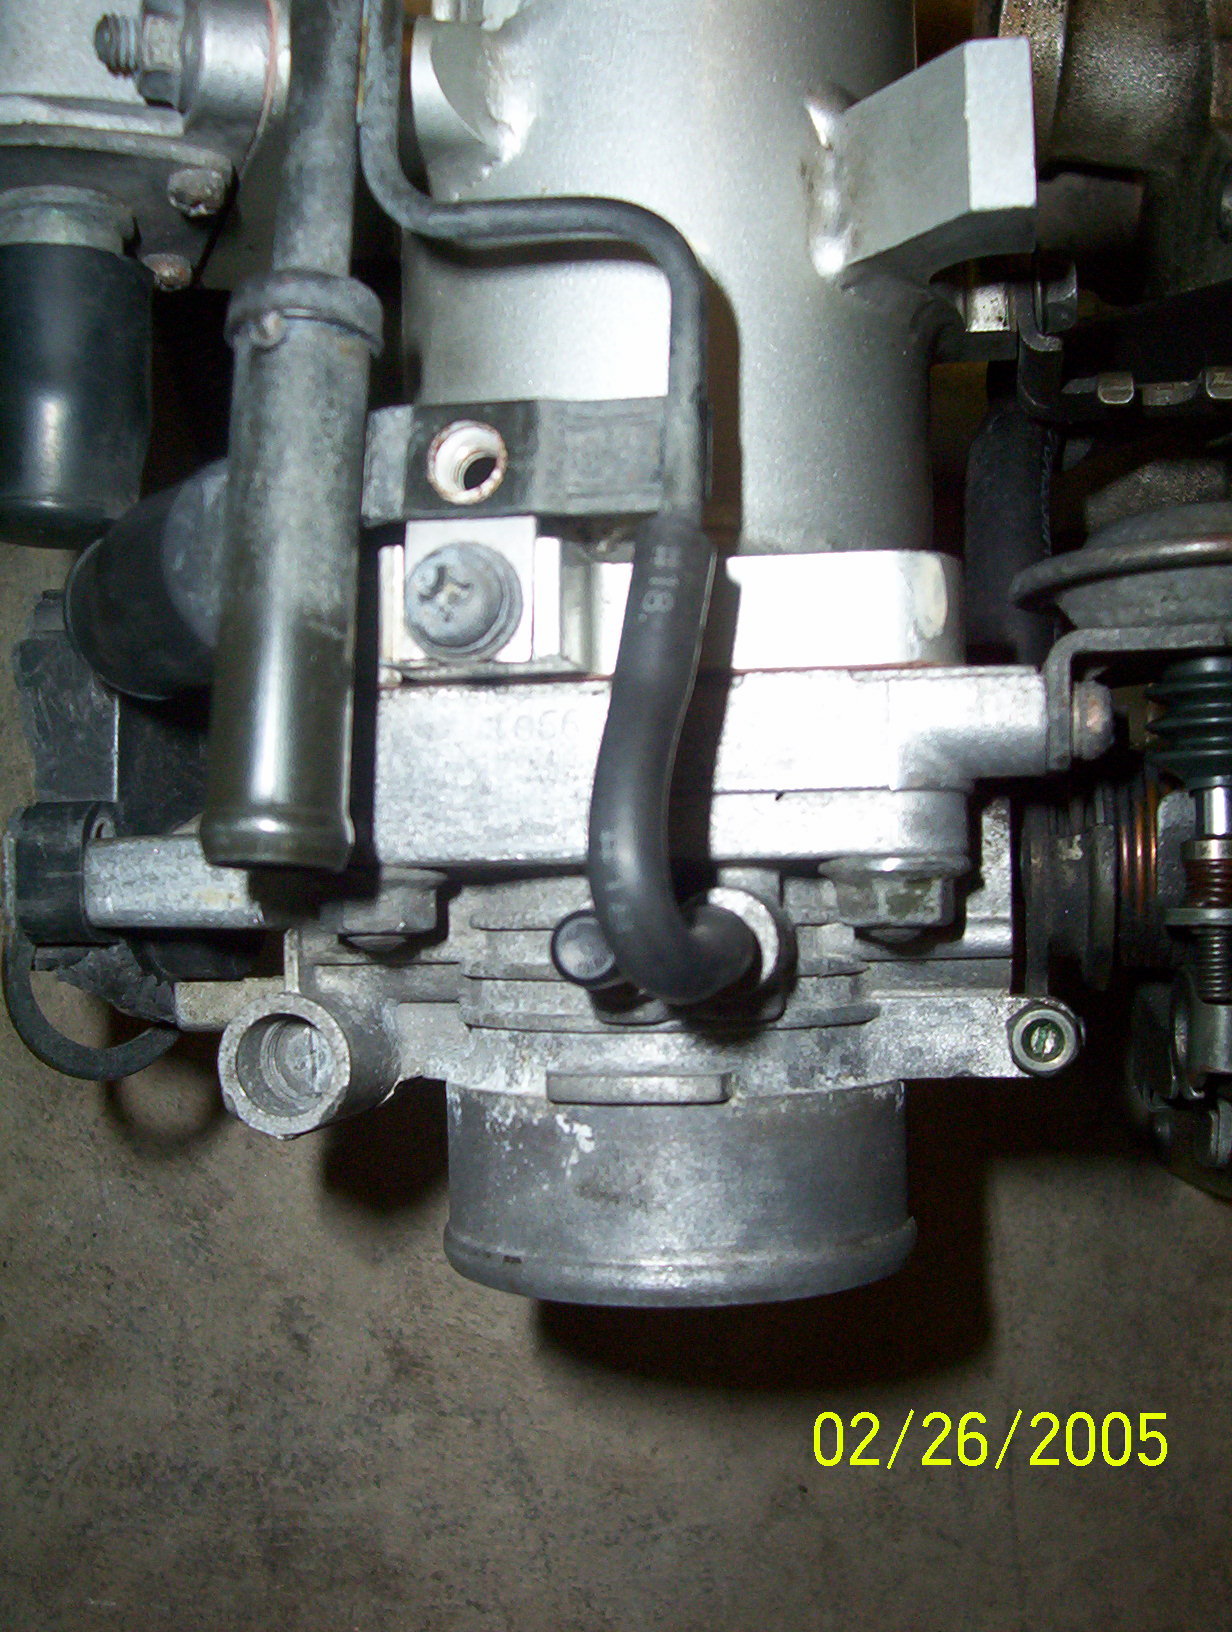
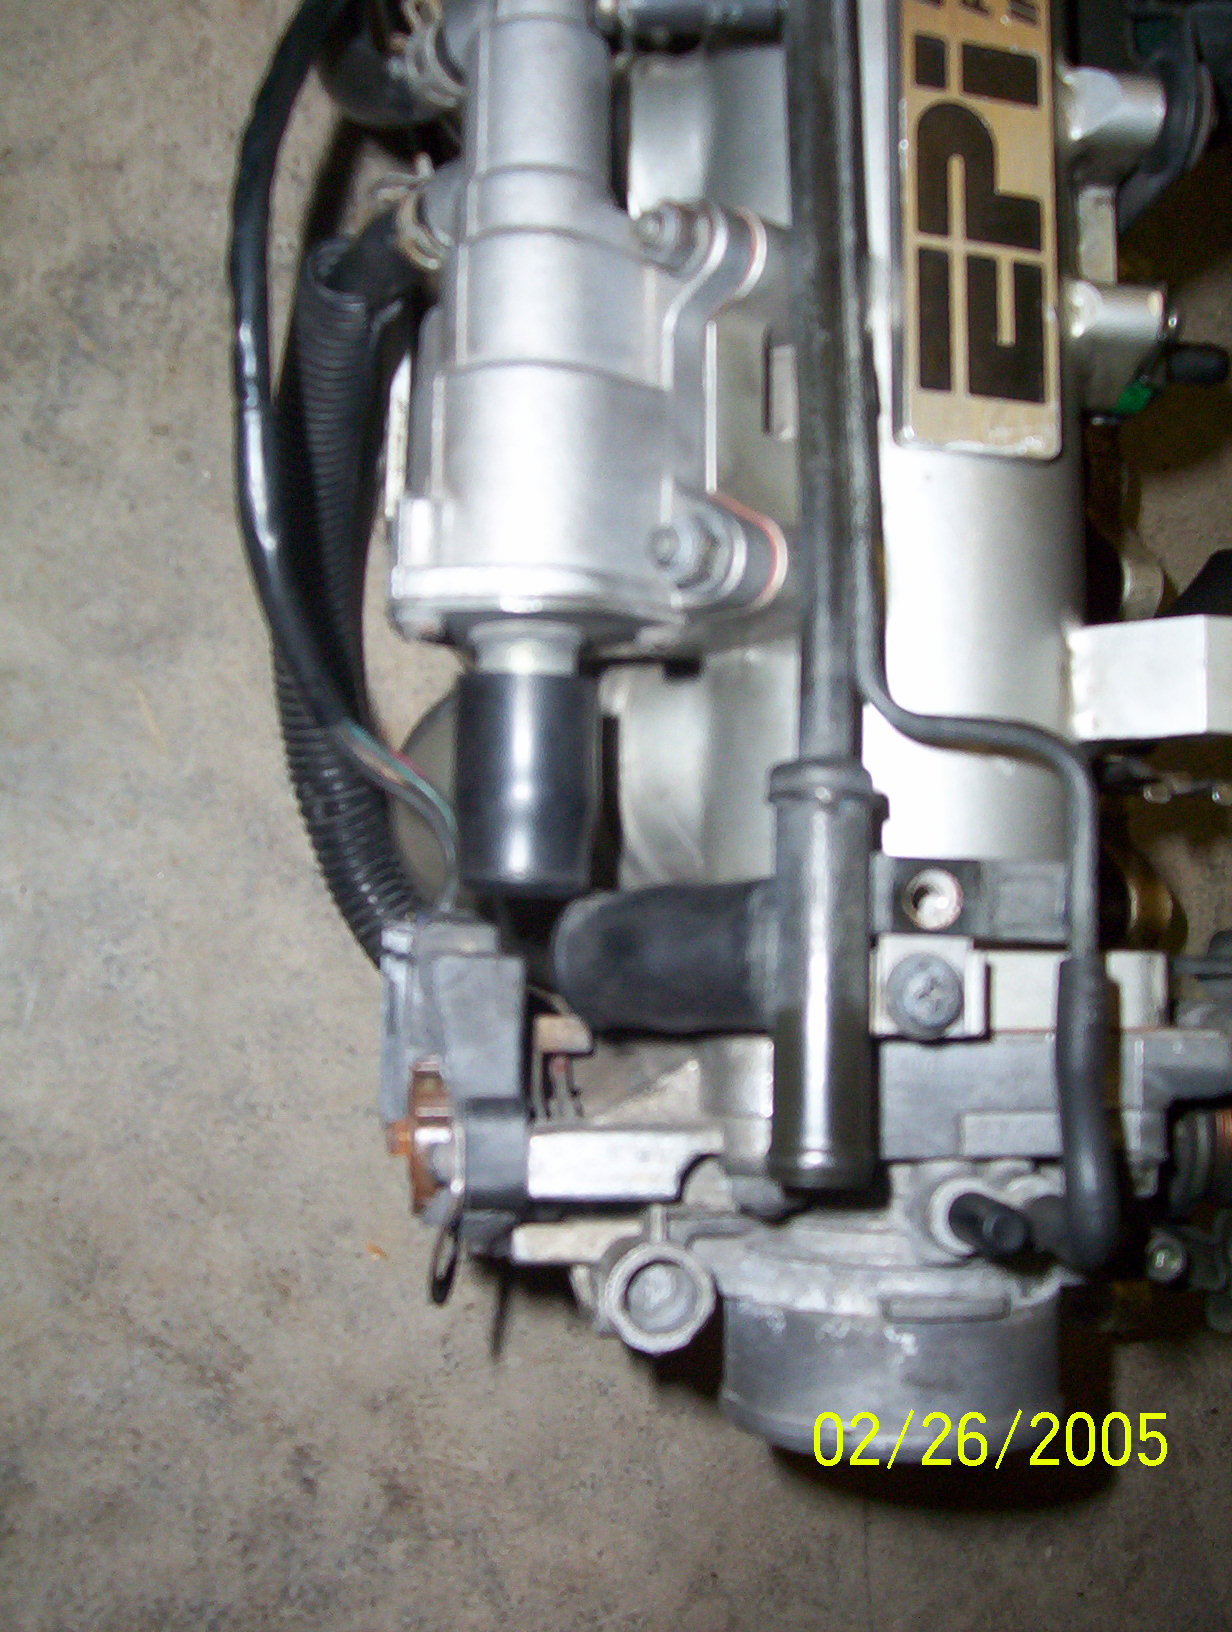
computer projects, but now I am ready to continue. The Cultus intake
manifold I've been waiting for since the end of December finally
arrived here; along with the fuel rail and injectors.
The injectors are said to have a different spray pattern than the
regular North American Swifts, and the fuel rail is the same.
The intake I have still has the stock Cultus throttle body attached,
and the original rubber hoses.

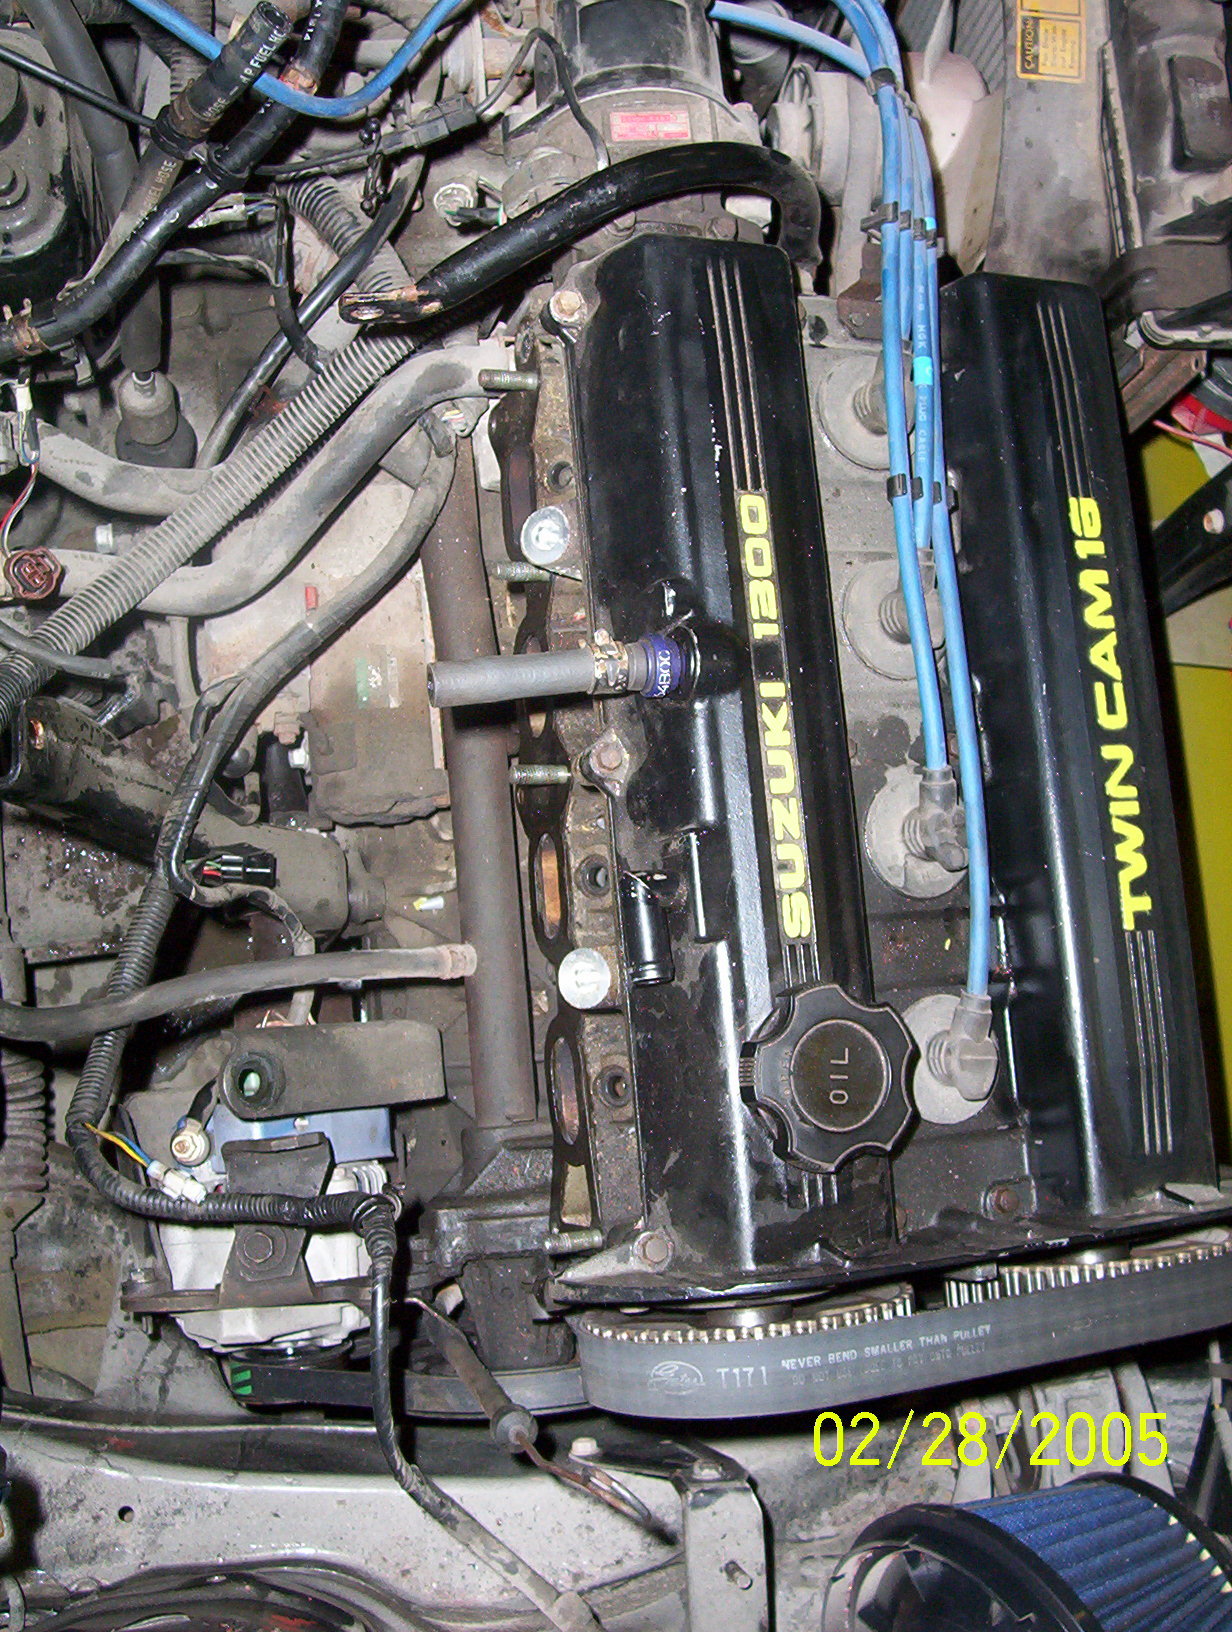
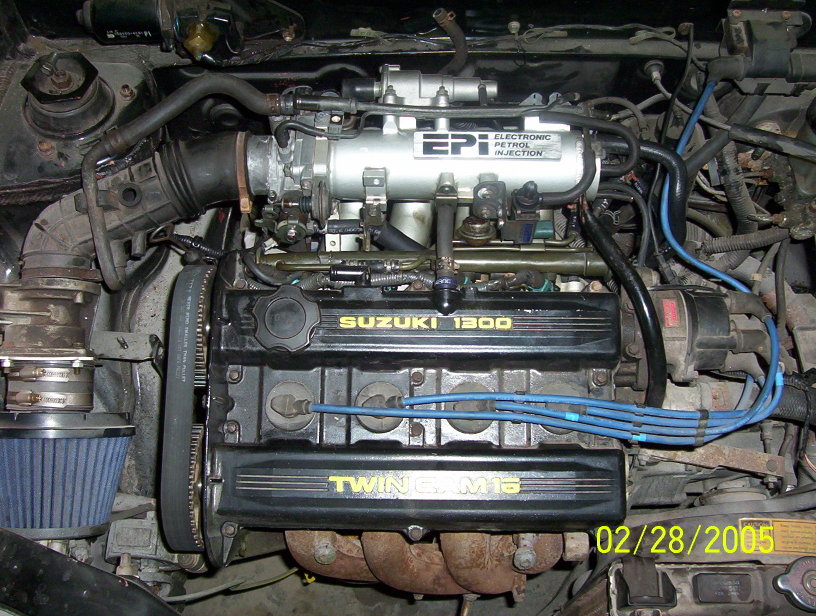
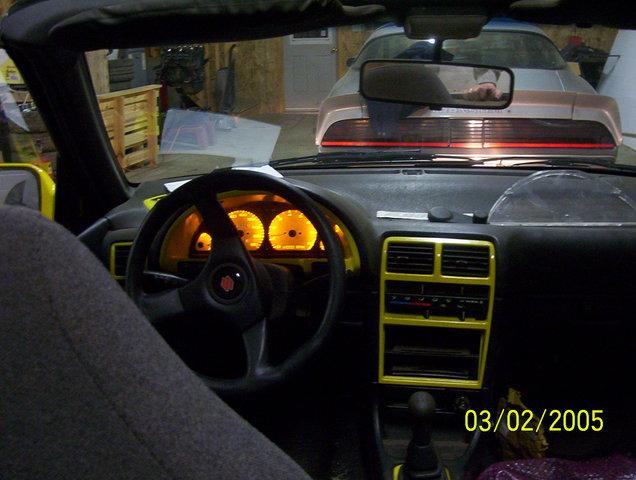
3/2/2005
~
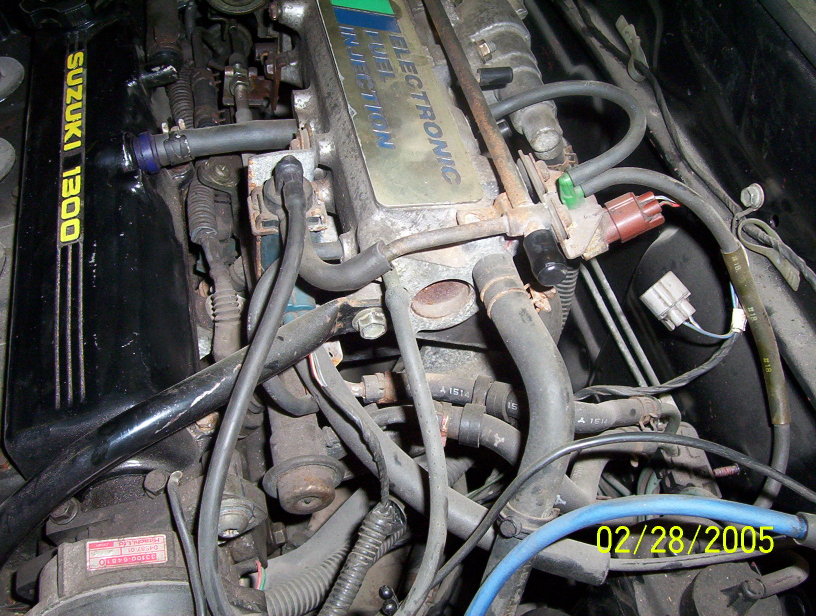
Intake now in place and finished. Electrical problems sorted out, wires
had to be diverted and re-run. Rear lights fixed up. Instrument cluster
is back in and tolerable at this point. Will address it later.
Determined to have this on the road and paperwork finalized by May 1.
With only the headers and springs in the way, it's a reasonable goal.
Will see about fabricating up strut bars afterwards.
3/3/2005
~ Drivers side spring changed out.
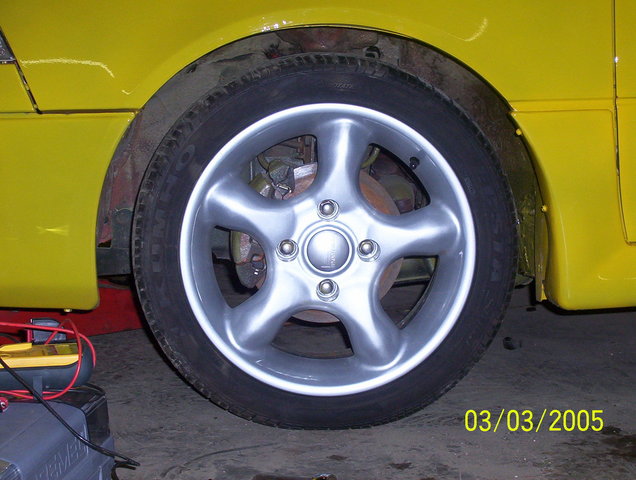
3/6/2005
~ Passenger side spring changed out. Going to need
a handful more plastic rivet clips to install the passenger inner
fender.
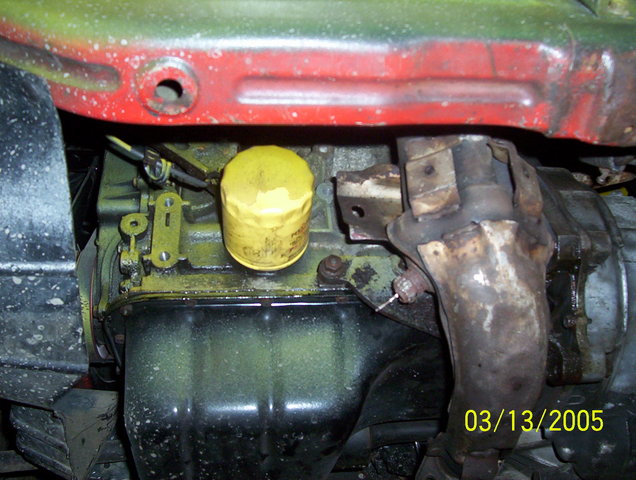
3/13/2005
~
Cultus extractors are on. Putting final touches on the exhaust piping.
Last bulb replaced in the rear. Safety inspection is lined up for the
end of the week, if the weather holds up.
3/21/2005
~
Didn't have a chance to fix the exhaust leak yet, probably get that
this week sometime. Did have it out of the garage to wash again, and
for a quick shakedown test drive between the garage and the house (200'
or so). Works pretty good, I'm very impressed with the throttle
response. It pulls along very nice! Definitely looking forward to
finishing this up and getting it on the road!
3/27/2005
~
Easter bunny brought some nice weather this weekend. Didn't pass up the
opportunity for longer trial dives. Took it out for a few clicks,
everything seems to be on par. Think this is prety much the end of the
project right now. Everything seems to be in place, with only the
paperwork to be finalized now.
It's been an interesting ride. Been a few knuckles scraped, a few beers
drank, a few curse words muttered. A lot of interesting people met over
the couple of years, a lot of different friendships developed.
Thanks guys. You know who you are.
~ Chris Ross
aka 'mojojoeyjojo'
Aftermath:
Mods after the fact....
5/14/2005
~
Ok, it was my first trip out to Greenfield Dragway. My first trip to a
drag anywhere in fact. There's a lot to be said about official drags.
It's not quite as easy as it looks! Strange I didn't get my low 15s I
was hoping for right off the crack of the bat!
Driving with a helmet is wierd. I couldn't hear the engine at first,
had some lousy reaction times, slow 60' (spinning). My times went from
a high of 17.68 to my best 16.58s. Reaction times steadily declined,
from 1.21 to 0.652, with a best speed of 85.23MPH.
Plans are to lower front wheel pressure, try 14" steel wheels +
radials, cam gears, dial in ignition timing more. More exotic plans
include finding and cutting F150 springs for the rear, and maybe trying
the Nissan 60mm throttle body.
Next Greenfield trip is June 4th.
")
")
")
")
")
")
")
")
")
")
")
")
")
")
")
")
")
")
")
")
")
7/26/2005 ~ Trip to the drags didn't work out, will try for August. In the meantime, have since fitted my 60mm Nissan throttle body, a K&N valve cover breather, oil catch can (or catch 'pimple'; thanks for that Ellpee...lol). Working with the old man, and a Hitachi engineer with plans to use a 55mm Ford MAF housing with the stock 45mm Hitachi sensor. Larger custom intake piping is also in the works. Updates to follow.
Oh yes, almost forgot. Recieved an 'adult knob' from a MK2 swift, courtesy again from Ellpee in New Zealand. Unofficial term is the 'dildo shifter', sure to make an extra +5hp.... :P


8/1/2005
~
Changing the stock MAF to a larger machined Ford MAF (55mm). Results
were not good, car ran very lean and quite boggish when < 3000 rpm.
Will have another shot at it after vacation, perhaps increasing fuel
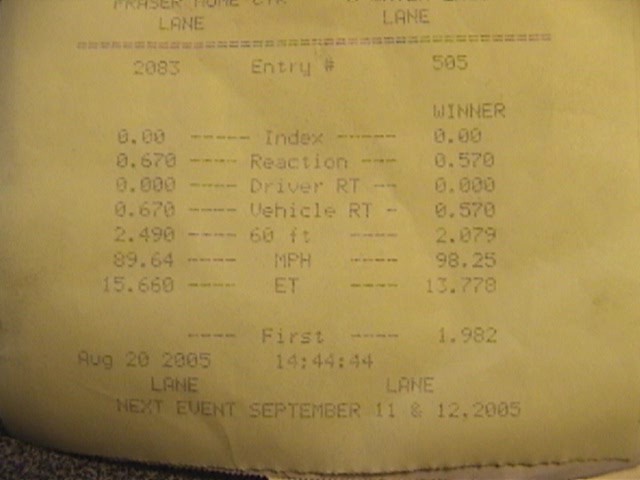
pressure or bigger injectors. 8/20/2005
~
Trip to the drag strip again. This time I mounted the stock 13" steel
vert wheels, 25psi up front, 35psi in back, removed the passenger seat.
Ended up with a very satisfying run of 15.660 seconds @ 89.64MPH. I've a few other things to try, hope to get out to the drag for the final horray on Sept. 10/11. :)

Notes: Trials and tribulations of re-assembly
Steering posts / columns
") My
91 vert and 92 GT steering columns have different mounts where the
center steering post is. Judging by the lack of fitment on the cross
brace for the center post, I'm assuming the center post is different
between the MK2 and MK3.
My
91 vert and 92 GT steering columns have different mounts where the
center steering post is. Judging by the lack of fitment on the cross
brace for the center post, I'm assuming the center post is different
between the MK2 and MK3.
From the picture, you can see the difference in the upper mount, both the location on the column, and the bolt pattern. Left column is the 92 GT, on the right is the 91 convertible.
Options at this point are to change the brackets to the GT column, or re-use the old MK2 column. The bracket is in an odd place, hard to get at the welds to grind them off though.
") The
wiring, column length, and lower mount is the same. Since my vert was
and automatic, it also has added hardware in the switch assembly.
There's a cable running from it which was used in conjunction with the
automatic shifter. It prevented the switch from being turned on or off
if the shifter selector wasn't in park. The switch itself is the same
on both models, but the GT 5 speed doesn't have this cable. Presumably
the '89 automatics also had this cable/lock feature.
The
wiring, column length, and lower mount is the same. Since my vert was
and automatic, it also has added hardware in the switch assembly.
There's a cable running from it which was used in conjunction with the
automatic shifter. It prevented the switch from being turned on or off
if the shifter selector wasn't in park. The switch itself is the same
on both models, but the GT 5 speed doesn't have this cable. Presumably
the '89 automatics also had this cable/lock feature.
I'll have to rig up a bolt or pin to have it look like the cable is pulled all the time in order to use the original column. This is clearly the best option.
[EDIT] On closer inspection, the GT column is a little bit longer. Also, the GT column switch assembly can't be mounted on the convertible column. When I did a test fitment, the switches only came within 3/16" to fitting on the ignition switch bracket. Looks like I will be removing the convertible column mount onto the GT column.
Steady bearing fun
") On
both my GS and GT, the steady bearing required replacement. This is the
bearing that sits in the housing that interconnects the right hand
drive axle. I've also seen this called a half shaft.
On
both my GS and GT, the steady bearing required replacement. This is the
bearing that sits in the housing that interconnects the right hand
drive axle. I've also seen this called a half shaft.
To make a long story short, it seems that Suzuki took the time to commission Koyo Japan to fabricate a totally custom bearing. This is well beyond comprehension. It makes no sense, as Suzuki could have designed the bearing mount in any shape they wished. It's illogical to have not utilized an already industry accepted common bearing specifications.
") That
said, the odd bearing used cannot be cross-referenced to any common SKF
or FAG bearing. The ID and OD of the bearing is a mismatched item. And
the only place to get a new bearing for this is directly from Suzuki
dealers themselves. At a cost of $122. Hmm, I'm beginning to think this
is the method behind the madness as Suzuki... $122 for a bearing that
can't be found elsewhere. Clearly there's no markup on this bearing, is
it...
That
said, the odd bearing used cannot be cross-referenced to any common SKF
or FAG bearing. The ID and OD of the bearing is a mismatched item. And
the only place to get a new bearing for this is directly from Suzuki
dealers themselves. At a cost of $122. Hmm, I'm beginning to think this
is the method behind the madness as Suzuki... $122 for a bearing that
can't be found elsewhere. Clearly there's no markup on this bearing, is
it...
") I
originally thought I could simply machine the housing out, so the ID
and OD could match a replacement. After some consulting from my
machinist father, he determined that the housing was too thin for this.
Second option was to machine the shaft, making the ID fit a common
bearing, and leaving the OD the same. Still no luck with that; there's
nothing that would fit.
I
originally thought I could simply machine the housing out, so the ID
and OD could match a replacement. After some consulting from my
machinist father, he determined that the housing was too thin for this.
Second option was to machine the shaft, making the ID fit a common
bearing, and leaving the OD the same. Still no luck with that; there's
nothing that would fit.
") Last
chance was to lathe the shaft, making the ID smaller; and creating a
sleeve to fit the housing. Hence, this would adapt the bearing OD. I
decided to buy a 6007 bearing, common enough. Came in at $12. The
thickness came in at a shade under the original, and the ID and OD was
close enough to work with.
Last
chance was to lathe the shaft, making the ID smaller; and creating a
sleeve to fit the housing. Hence, this would adapt the bearing OD. I
decided to buy a 6007 bearing, common enough. Came in at $12. The
thickness came in at a shade under the original, and the ID and OD was
close enough to work with.
My father set to work on the sleeve, matching the housing precisely, and milling the center to match the bearing. The inside is actually a L shaped pattern to match the bearing thickness. The original snap ring would hold the sleeve in place, everything is locktited together.
The shaft was another story. To quote, "That is the hardest damned steel I've ever seen!" was what my father said. He didn't have a carbide cutter bit for his lathe, so he took it to Adrian Westin in Liverpool for machining. After an hour of setting up the lathe's chuck, he determined that the shaft wasn't running true. He explained that many new parts actually have fairly low tolerance, and it's rare to see perfect shafts or gears come straight from the factory.
I believe that a total of 1mm was machined off the shaft. The carbide cutter is now destroyed, and during the process, white hot chips of steel bounced all around the shop. A testament on how tough the shaft is. Cost of 3rd party machining of shaft: $20.
So, $122 bearing is now only costing $12 (replacement bearing) + $20 (machining services). If this doesn't stand up in real life driving, I can always go back to the spare GT housing, axles and hubs if need be.
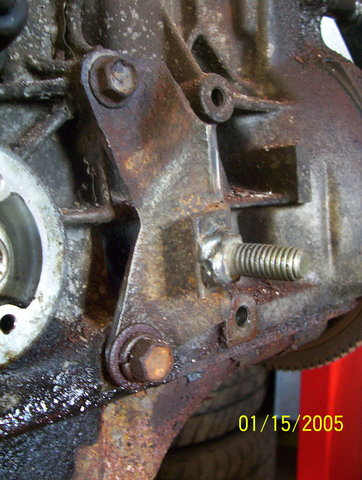
Motor mounts
The tranny mount will need addressing. Some opt for the 'L' bracket, some are lucky enough to have the proper nut simply hidden behind a small sheet metal covering, and some also scab in a piece of frame like I did. The motor mount on the timing belt side will also need to be moved closer to the grill by about 2 inches.
MK2 - MK3 Interior Swap, and Other Misc. Items
I like the rounded dash of the MK3 more than the MK2. Swapping it over takes common sense and a little patience. Listed below are the minor speed bumps encountered during the swap:
![]() Top
mounts are different. MK3 mounts are about 1" longer. You could change
the mounts over, or possibly use longer bolts. I'm trying the latter
option.
Top
mounts are different. MK3 mounts are about 1" longer. You could change
the mounts over, or possibly use longer bolts. I'm trying the latter
option.
![]() Pillar
trim isn't an exact fit.
Change these over at the same time for a perfect fit.
Pillar
trim isn't an exact fit.
Change these over at the same time for a perfect fit.
![]() Bottom
brace needs to be lowered
about 1.5".
Bottom
brace needs to be lowered
about 1.5".
Misc. items include:
![]() Power
mirrors option: My original doors had the cutouts for the wiring
already in place, just covered up with tape. Longer screws are needed
if you want to use the rubber backing and the power GT mirrors.
Power
mirrors option: My original doors had the cutouts for the wiring
already in place, just covered up with tape. Longer screws are needed
if you want to use the rubber backing and the power GT mirrors.
![]() The
front sway bar will bolt into
place without problems.
The
front sway bar will bolt into
place without problems.
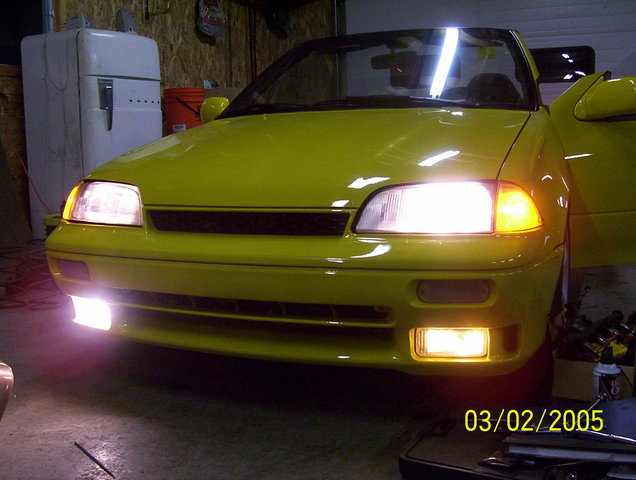
![]() Clear
corner lights from the UK aren't an exact fit. They use different bulbs
(much bigger) so the headlight mount bracket needs minor surgery. And
the lower corner phillips screw that fastens to the fender needs some
adjusting. I believe I have a solution for this: removing the plastic
clip that the screw fastens into, and opening that bracket up a bit,
then use cold weld compound to hold it in place once it it fitted
properly. I believe the angle for the corner screw. Will update the
page once it is figured out.
Clear
corner lights from the UK aren't an exact fit. They use different bulbs
(much bigger) so the headlight mount bracket needs minor surgery. And
the lower corner phillips screw that fastens to the fender needs some
adjusting. I believe I have a solution for this: removing the plastic
clip that the screw fastens into, and opening that bracket up a bit,
then use cold weld compound to hold it in place once it it fitted
properly. I believe the angle for the corner screw. Will update the
page once it is figured out.
") *update*:
You have to grind away a lot of the meat on the headlight bracket to
fit the corners. Make many measurements, cut once. After some fiddling,
it will actually fit.
*update*:
You have to grind away a lot of the meat on the headlight bracket to
fit the corners. Make many measurements, cut once. After some fiddling,
it will actually fit.
")
")
")
![]() Converting
the doors to mk3: It will work! Here's how: you need the metal rods for
the locks and latch release from the mk3, swap those. In the second pic
above, take the yellow plastic insert in 'A' and throw it away. Use the
white insert instead that below it. Move the white insert at 'B' and
put it in the hole that's just left to it. Swap the lever assembly. You
should what's shown in the 3rd pic.
Converting
the doors to mk3: It will work! Here's how: you need the metal rods for
the locks and latch release from the mk3, swap those. In the second pic
above, take the yellow plastic insert in 'A' and throw it away. Use the
white insert instead that below it. Move the white insert at 'B' and
put it in the hole that's just left to it. Swap the lever assembly. You
should what's shown in the 3rd pic.
The door panel needs some grinding to accommodate the window regulator. See below for the before and after shots to get an idea how much to take off.
")
")
The final result looks like this:
")
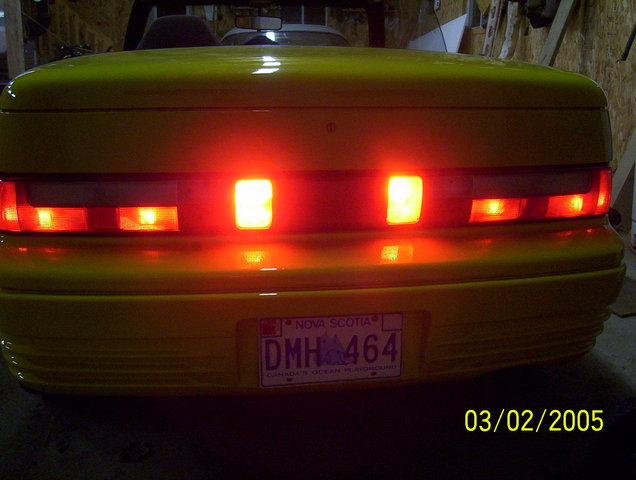
![]() The
rear section needs a little work to accommodate the center piece when
converting to the mk3 lights. The tab mounts need to be welded on, as
well as mounting holes drilled and tapped for the top bolts. If you are
converting to the overseas center with the embedded lights, it goes
without saying that you'll need to splice into your wiring harness.
There's a couple of options for this, you could use the center as a 3rd
brake light and tie it in that way. Considering the brightness of it,
decided not to. Instead, it is wired as it is in the UK; a rear
foglight. There's a foglight relay under the steering column that
you'll need to splice into for this.
The
rear section needs a little work to accommodate the center piece when
converting to the mk3 lights. The tab mounts need to be welded on, as
well as mounting holes drilled and tapped for the top bolts. If you are
converting to the overseas center with the embedded lights, it goes
without saying that you'll need to splice into your wiring harness.
There's a couple of options for this, you could use the center as a 3rd
brake light and tie it in that way. Considering the brightness of it,
decided not to. Instead, it is wired as it is in the UK; a rear
foglight. There's a foglight relay under the steering column that
you'll need to splice into for this.
")
To be continued...